Document and templates
test
Document - view
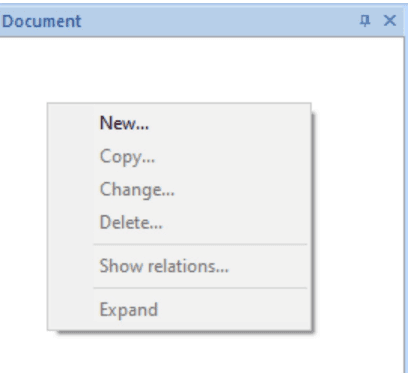
The document view provides a comprehensive overview of your documents. To create a new document, right-click in the Document field and select “New.” Note: The dialog box used here is similar to those for “Add” and “Change,” except that in “Change,” you cannot modify the document’s name. Use “Copy” to create a new duplicate of the document, “Delete” to remove the current document, and “Show Relations” to discover if the current document is referenced in other documents (refer to the “Show Relations” chapter for more details). Select “Expand” to enlarge the document in the Current Document window.
When selecting a New document, a document properties dialog will be presented.
PDF/UA (needs a license key)
Reason why
PDF/UA (UA = Universal Accessibility) is an international standard to present the content of a PDF. PDF/UA support is of interest to persons with disabilities who require or benefit from assistive technology when reading digital content. You do this by tagging the content of the PDF in a logical order.
External utilities
Below is a list resources that are useful when developing and testing PDF/UA.
- PAC, the PDF Accessibility Checker - A free tool which allows accessibility checking of PDF documents according the PDF/UA standard.
- NVDA - A free screen reader popular among Windows users.
- Built-in screen readers that consumes PDF/UA exist on Windows and Mac.
Sample application
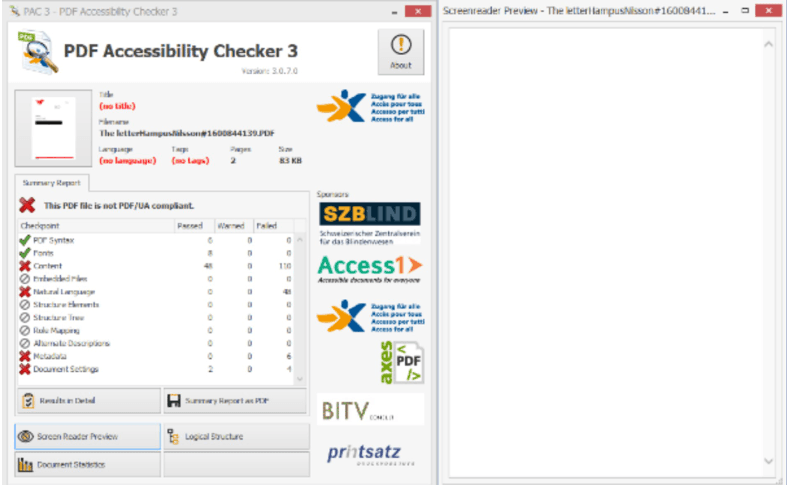
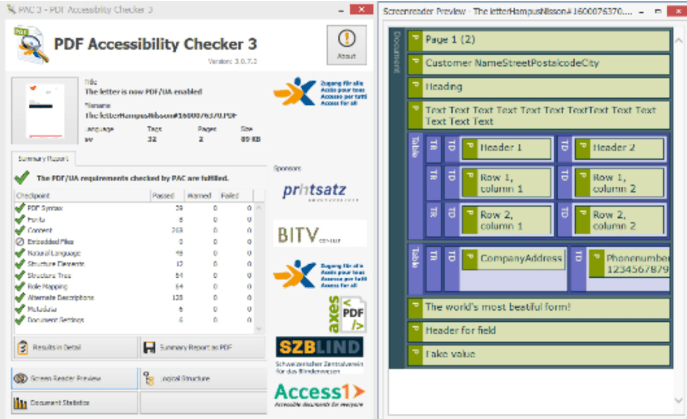
In this example we will use the program PAC3.
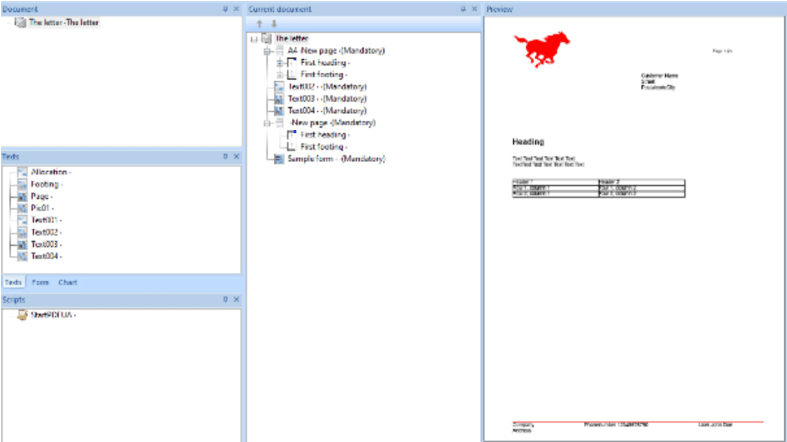
We start of with a very simple document:
PDF in PAC3 without user accessibility
When we use the PAC3 program to see if the document is PDF/UA compatible, we get the following results:
How to make it compatible
To make the document compatible with PDF/UA in the simplest possible way, we use the following script in the beginning of out document.

When we now run the pdf in PAC3 we get the following results:
The PDF now meets the requirements for PDF/UA.
However, this can be further simplified for the function-varied by building up structure in the document.
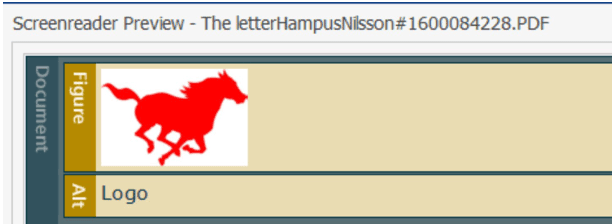
Images
In order for it to appear that there is an image in the document, we need to enter an alternative text on the image.
![]()
When we include the alternative text, we now get the following results when using PAC3:
We can also divide the document into different sections. At this point, we are able to utilize Sect and Div:
-
Sect: Grouped related content parts, for example several paragraphs, which can be combined into a group
-
Div: Generic group element without semantic meaning.
In this example, we want the address field in the letter to end up in a separate Div. we start by creating the following script.
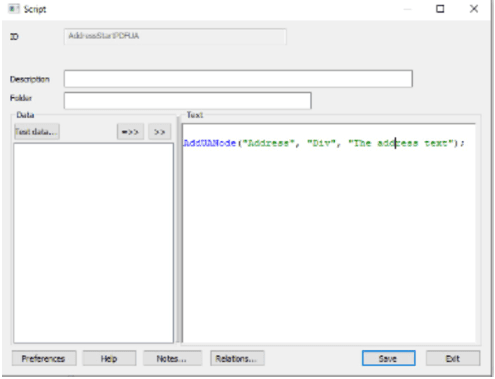
This marks where the division should begin.
Now we need to create another script to show where the division should end. we do this with the following:
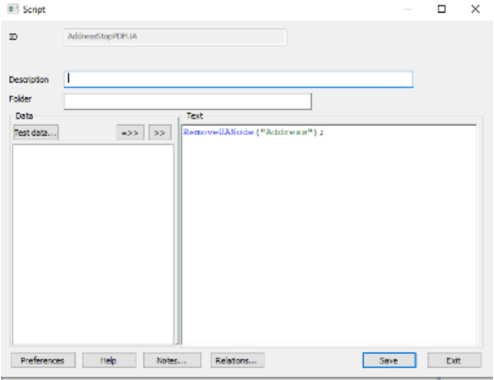
When we place the address between the two scripts we get the following results when we use PAC3

Tables
When using PDF/UA, the best option is to use a table structure instead of putting the table directly in a text. This will make it clearer to the user of the PDF how the table is structured
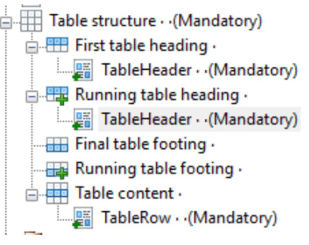
As you can see in the example below it is clearer för the user that the first row is the table heading and the second row is the table data.

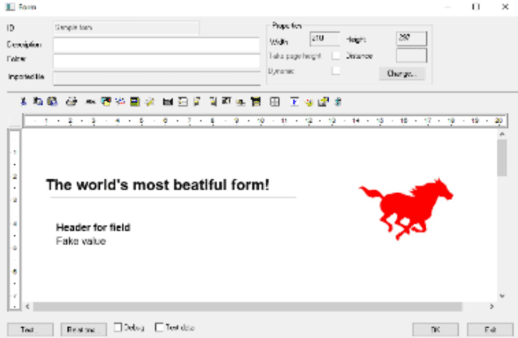
Forms
If forms are to be included, you must sort so that all texts and fields are in the correct reading order.
As you can see in the form below it visually reads from left to right. that’s not optimal for the “person using the PDF”.
To make the PDF read out the the objects in the desired order, we use the Item list in the form tool.
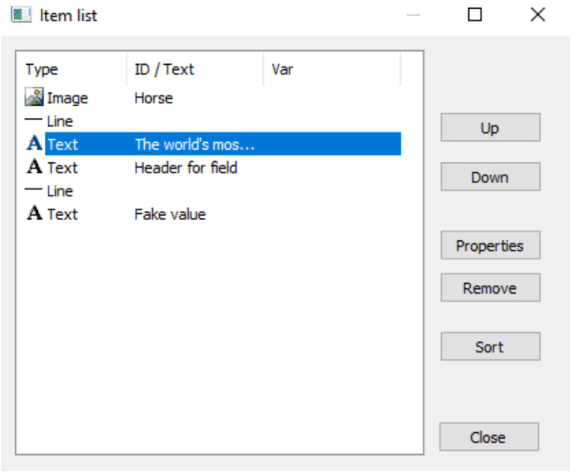
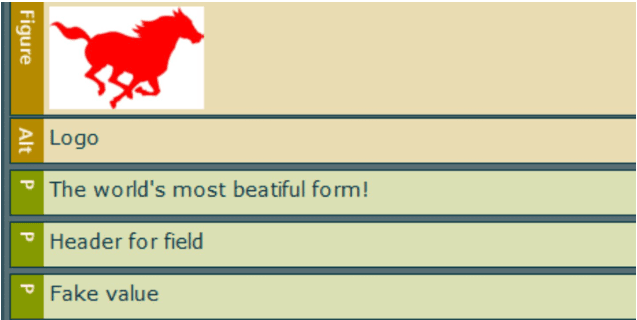
When we arrange the objects like in the example above the PDF will be read out in the following order:
Index level
To make it clearer for the visually impaired to distinguish what is what in the text, we recommend that you set an index level on the different fonts you use in the document.
Limitations
- It is not possible to merge several different documents with APPEND and keep the PDF/UA information.
- PDF/UA is not enabled for PDF input fields.
- PDF/UA does not work using Metawrite for Word. However using Metawrite for Forms or the WebEditor will keep the PDF/UA information.
- It is not possible to use SaveDoc or add pages in a batch run and keep the PDF/UA information.
- Business graphics are tagged as artifacts.
PDF/UA limitations
While links will still work as usual, following limitations applies to PDF/UA:
- Links on Images and Canvases will not be represented as PDF/UA.
- Links residing on running headers/footers will not be represented as PDF/UA
When StartUACollection() has been called in a document running headers/footers must be explicitly declared. This is in contrast to a regular document where omitting running headers/footets will automatically reuse first headers/footers for the consecutive pages. To have same headers/footers for all pages you have to declare them twice. To just have first header/footer you’ll have yo declare empty running headers/footers.
If running headers/footers are not declared on a document that has called StartUACollection, running headings/footers will be discarded and a warning will be displayed:

Beware that this is just a warning and will not stop Metaengine from generating a PDF. The generated PDF is however invalid and might be incorrectly handled in your PDF viewer so please adhere to the warning and fix the issue!
Show relations
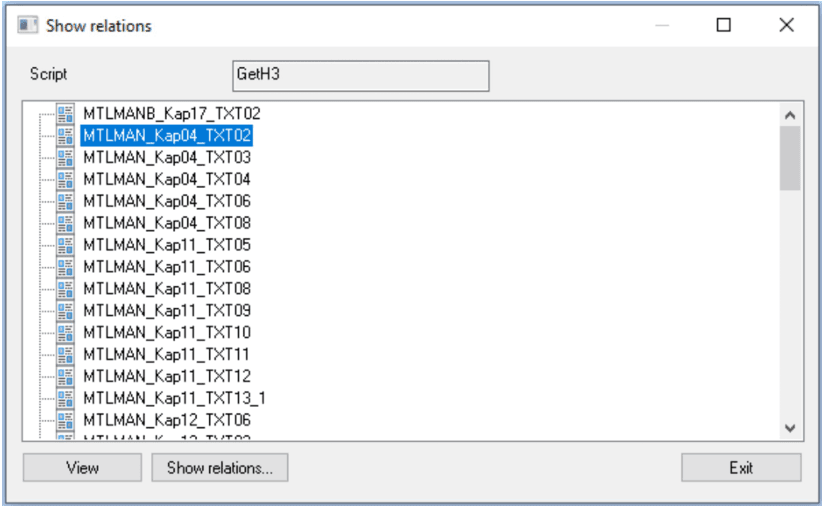
Since re-use of resources is an important concept in MetaTool, it is vital that the user can be certain it is safe to change the resource, before any changes to an already existing resource, texts, forms etc. are made. This is what the Show relations is for.
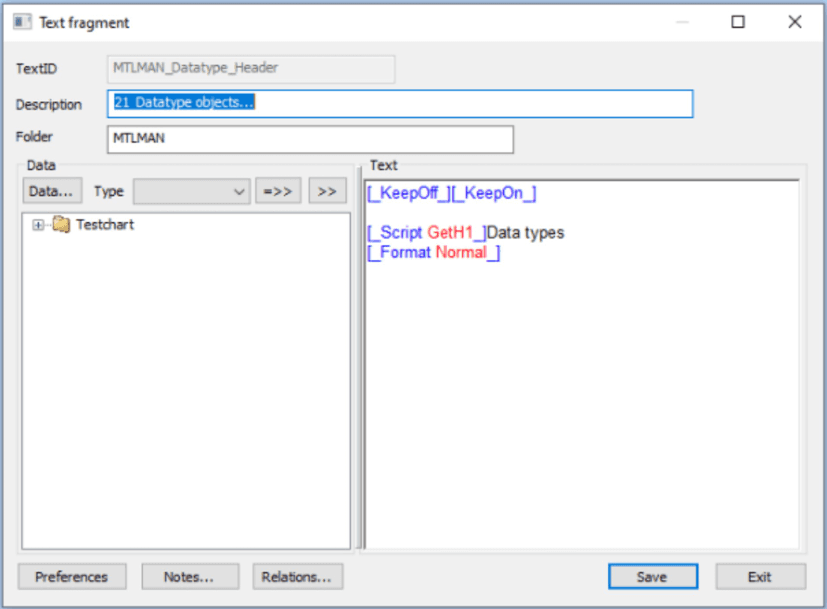
To see the relations for an item just left click on the actual item in the list and then click the button Show relations…
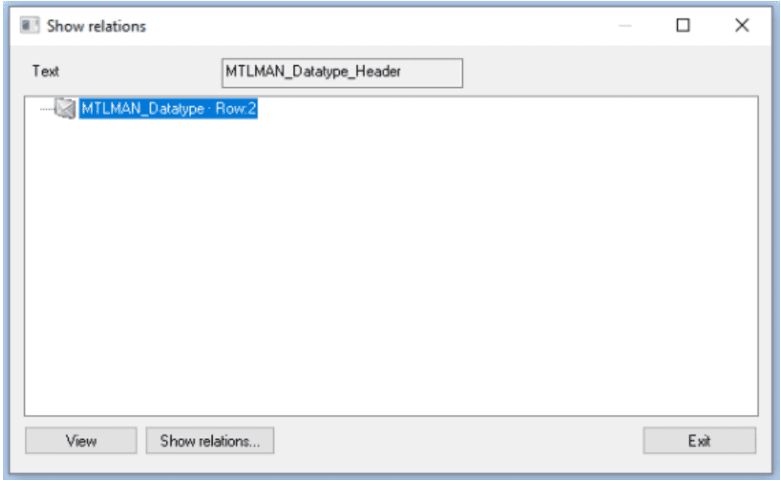
Show relations can be found in many different dialogs and panes where this can be important to know. The dialog displayed has mainly the same appearance. The only difference is the top line indicating the type of item you are listing the relations for.
Buttons:
| Button | Explanation |
|---|---|
| View | Go to the text/paragraph where the immediate object occurs. |
| Show relations… | Show relations for marked item. |
| Exit | Exit the dialog. |
It is possible to show relations with a new relations button in the bottom of every dialog window.
Right click on an item and you will get a new popup window with the functions you can choose. You can also mark an item and click the buttons in the button.
Test data
You can connect your document to Test data. It facilitates the verification of the document being correctly made up with a final design as required.
To manage Test data, select Edit/Test data… See chapter Generic list dialog.
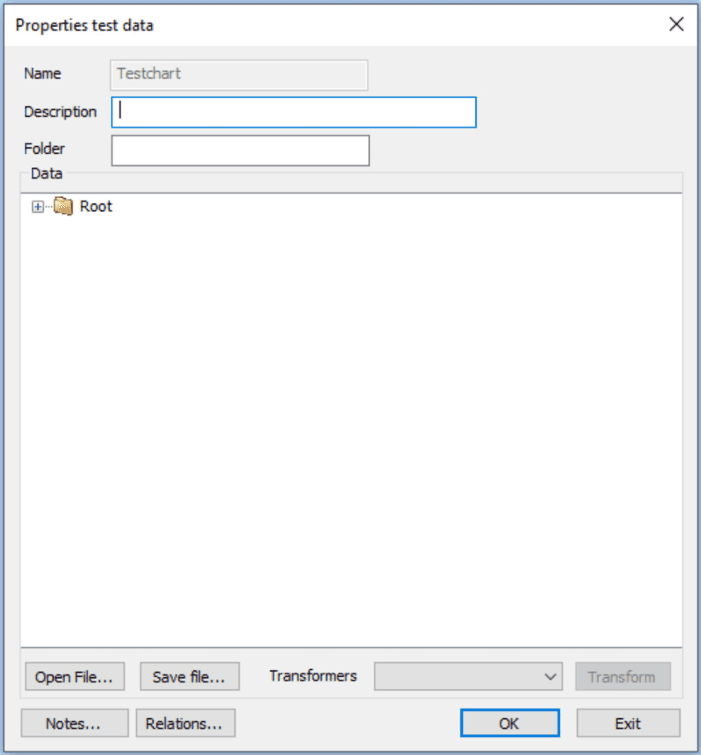
This list dialog could then get you on to the Properties Test data dialog.
| Function | Explanation |
|---|---|
| Name | The name of the Test data file. Can not be changed in Change Test data. |
| Description | A descriptive text of the Test data. |
| Data | Shows the content of selected test data. |
| Open file… | For import of test data from outside MetaTool. The test data file must be an xml file. |
| Save file… | Save testdata as xml file outside MetaTool. |
| Notes… | Area for notifications. |
| Relations… | List over related objects. |
| Transformers… | Select a transformer, if one exist, and press transform to create a transformed datafile that can be saved/used when developing document. More information see chapter Transformer. |
Test data pane in main view
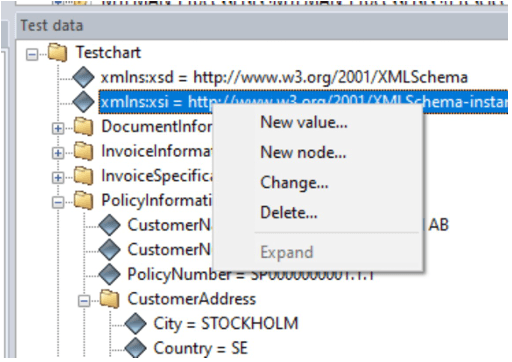
In the test data pane in the main view of Metatool one can alter loaded test data by right clicking on any item in the view.
By selecting “New value…” or “Change…” the following dialog appears:
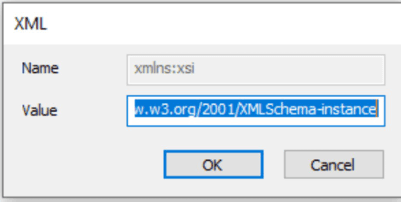
If the value of the attribute is very big (more than 32 kB) the edit field might not show value in the field. The value is however loaded as one can see in the pane.
Note that if one tries to right click on the root element (Testchart in the image above) and do manual changes to the test data it will not work (even though the dialog suggests otherwise). One have to select an item below the root element (like xmlns:xsi in the image above) to do changes to the test data.
Process lists (for MetaWrite and partly for WebEditor)
The Process list is used to define a process in an online application. For MetaWrite it works completely. For the WebEditor it is recommended to do a dummy-process (an empty process without any steps) and attach it to editable documents in order to separate them from pure Ondemand-document templates as the response from the get online documents will contain the attribute HasProcess=true on documents with a process.
To manage or add a Process list you select Edit/Process lists… See chapter Generic list dialog.
This dialog is used to define the online process and will be more fully be described in the MetaWrite process document.
| Function | Explanation |
|---|---|
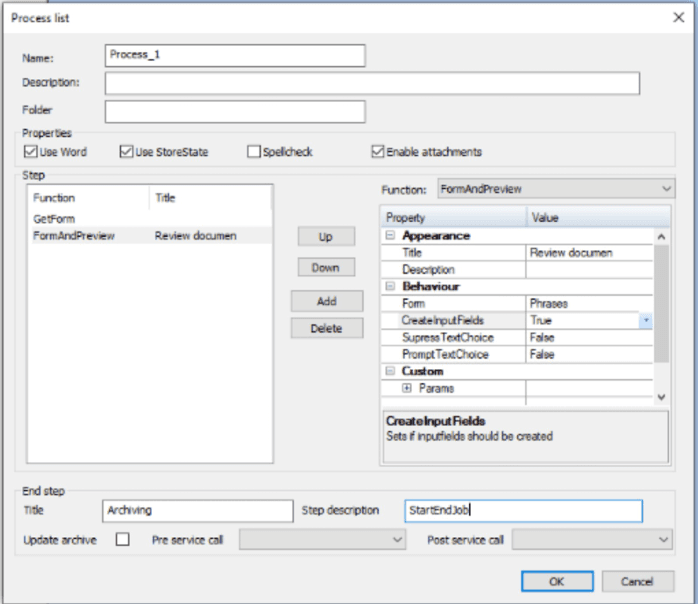
| Name | Give a name to the process definition. |
| Description | Description of the process. |
| Properties/Use Word | Checked if Word is a part of the process. Unchecked for PDF document |
| Properties/Use StoreState | Checked if the process shall be able to be stored temporarily before approval. |
| Properties/Spellcheck | Checked if spellchecking shall be done in forms. Not in Word. Word has its own spellchecking function. |
| Properties/Enable attachments | Checked if user shall be able to add attachments to the document |
| Step/List window | List the currently defined process steps, empty if new. |
| Step/Up | Move a process step up in list. |
| Step/Down | Move a process step down in list. |
| Step/Add | Button to add a step, for the step’s properties, see below. |
| Step/Delete | Button to delete a step. |
| End step/Update Archive | Checked if document shall be archived in the Dynamo database. |
Process step properties
Each step have its own properties and will be further described in the MetaWrite process document. The step has a function and a predefined step type. Each step type can have a Title, Description, Behaviour, and Custom (user-defined) parameters.
Additional input may be required depending on which function that have been selected. The additional input will be presented under the step behaviour.
Solution Information
Solution - Database for simultaneous coding and easier maintenance
MetaTool can work against a database connection via an ODBC source, known as a Solution. The creation of the database is done in MFSolution. See the MetaSolution (MFSolution) manual for more information. MetaTool has been tested to work with Microsoft SQL Server version 2005 and above.
The advantages of working with the MetaLogic file (document logic) using a database are several:
- Simultaneous development against the same “document logic”, by several developers.
- Use of change log; The Metaforce change log is an elementary form of version management tool. All the changes entered by the developers in the document logic are logged in a separate table in the database. Via MetaTool and the change log you can recreate any old version of any object.
- Sharing resources between projects. Common objects can be inherited instead of creating the same objects/resources in every project.
- Use of access control, by Roles, Usergroups and can be connected to AD Group (Active Directory) in domain server.
- Change management, using packages.
Create ODBC definition to the database.
To be able to work with MetaTool against a Solution database the following steps must be executed.
- Create database.
- Create the ODBC connection against the database.
These primary steps are not described in this manual since they are not specific to MetaTool. Contact system support if further information is needed.
All document developers involved must be assigned the right to write in the database, this is handled by MFSolution application, see MFSolution application manual for more information.
Connect to Solution database
Use this dialog to use the combination of database, project and package you want to work with.
The database is connected via an ODBC source.
The Solution list only shows the projects the user has read or write access to.
Database source + Select: The latest selected database is shown. A new database source can be selected by pressing the Select button.
Package: Select “No package” to work without change management (Packages) or to work with the main trunk. Otherwise select the identity of the package to work against.
Inheritance from another project
A project can inherit from another project. By doing so it gets read only access to all of the baseprojects resources. An inherited resource can at any time be disinherited, that is a local copy with write access will be created in the child project.
The chain of inheritance has no limit. A child project will automatically inherit resources from grandparents and great grandparents as well. Too long chains should however be avoided as the implications on maintainability could be an issue.
A project can change its baseproject at any time. When doing so one should be aware of the implications a Version 11.9, March 2024 Copyright 2003-2024 Metaforce AB - All rights reserved 147 (201) change might lead to. For instance, the new baseproject might not have all the named items that exists in the previous baseproject leading to missing items in your project…

All items in a parent project will automatically be inherited. A project can only inherit one project but will on the other hand inherit all items from it parent’s parent and even greater grandparents.
Note: Versions of Metaforce prior to V6 used another mechanism when inheriting from a baseproject. Be aware of that all items are now implicitly referred when inherting a baseproject. You don’t explicitly refer to individual items any more!
37.1.4 Copy /Disinherit
Use this dialog to:
- Copy items after searching for different document parts in either coupled base-project and other projects that you have access rights to
- Disinherit items inherited from base projects
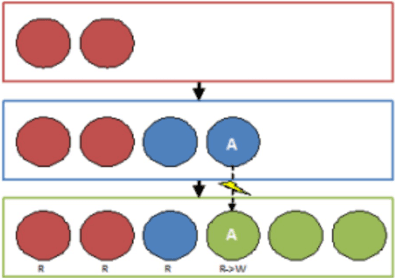
Disinherit item ‘A’ creates a copy with the same name. Changes of the green item ‘A’ will not affect the blue item ‘A’ and similarly, opening the blue project and working with item ‘A’ will not affect item ‘A’ in the green project.
A possibility to copy selected parts to your own project exists. When an object is copied, it is verified for any references that the object can have. If the object has references that are missing in your own project a dialog is shown where you get the option to copy these, see chapter Missing object.
The list illustrates if corresponding document parts (same name) exists in your own project and how the found object relates. Selection of an object makes the list change depending on what functions that is applicable to that object. The following functions exists:
| Function | Description |
|---|---|
| Disinherit | Is made active only if you select an item inherited from another project. It will break the reference to the base-project and creates a local version of the object into your own project. |
| Copy | Displays the object properties dialog in Copy mode where you can give a new name to make your own version of the object. Opens dialog Missing object if needed. |
| Show | Displays the object properties dialog in write-protect mode. |
Copy /Disinherit dialog
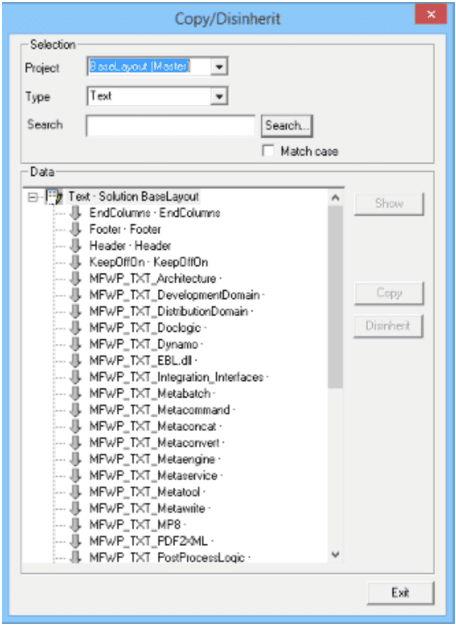
Copy/Disinherit to - example dialog…
Description Copy/Disinherit:
| Function | Description |
|---|---|
| Selection/Project | Dropdown, lists all projects that you have access to. If the current project inherits from the base-project then the base-project is pre-selected at start of this dialog. Search in all projects is supported. |
| Selection/Type | Dropdown, lists the different document parts that can be copied or disinherited. |
| Selection/Search | Used to free text searches in the various object. E.g. you can search for a variable name and the list will only show texts that includes the name. |
The list displays different icons to show the object status.
| Icon | Description |
|---|---|
| Object is referred to from base-project. | |
| Object is missing in ones own project | |
| Object exists with the same name in ones own project and selected project and they are the same. | |
| Object with same name exists in ones own project and are different in selected project. |
Missing object
This function is shown when you want to copy an object that includes other object that are missing in your own project. The search is done until all missing objects are found.
To maintain a consistent solutions you should copy these missing objects. If you still go ahead, without copying the missing objects, by pressing the OK button you will get into problems since some required object or objects will be missing during document generation.

| Missing objects | example dialog |
|---|---|
| Show | Shows the selected row properties dialog in write protected mode. |
| Select all | Checks all rows in the list. |
| Deselect all | Deselects all rows in the list. |
| OK | Controls that all objects copied or referred to have been selected. If not a warning message is display. If you have updated all rows or Yes was chosen at the warning message, then all copying to the start object will be processed. |
| Exit | Cancel do not update the start object. |
Packages
A solution can contain any number of packages. A package should be seen as a collection of work items, that is items in MetaTool like documents, texts, rules etc, with the intent of being merged into the main code base, when ready for production. The main reason for such a workflow is the possibility to work with one or several future release(s), without interfering with the current production code base.
To facilitate the merge of a package into the production code, MetaTool keeps track of changes in items of the production projects, that occurred after checkout to a package. It even prohibits merge of a package when conflicting items exists in the package.
A package could conceptually be considered a unique label defined in the Solution database. When selecting a project to open, the existence of such a defined label (i.e. “Release May 2013”), will cause any changes (new, change, delete) to reside in parallel to the main unlabelled project.
Note that the scope of a package is global for all projects in a Solution, making it possible for a package to contain items from several different projects.
If multiple packages exists in the Solution then it is possible to move items in package to another package, this can be useful if a change should not be part of the current package. Due diligence needs to be taken though since document structures can be difficult to move since all things belonging to a document structure needs to be move as well.
A compare tools exist in the package dialog to help document developer that can help with finding out what have changed in the package used.
Note: You log on to a Solution and select the project and under what packet flag you would like to work under. Selecting “No package” means working with the main code base, which most of the time should represent the current production code.
Create a Package
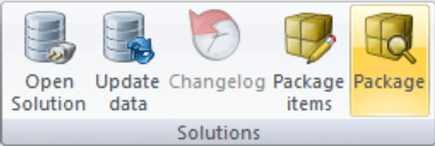
To create a package click the “Package” button…
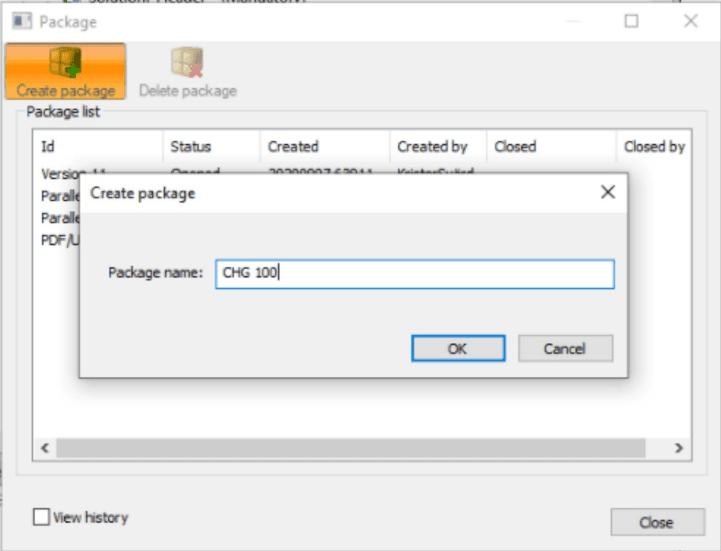
…and click “Create Package”. Give the package a unique name in the following dialog and you’re all set.
Note: Check the “View history” checkbox if want to see closed or deleted packages, else only created packages will be listed if any.
Delete package: Activated when item is selected. Deletes all package items and all package related items in the change log.
Working with package
When a package is defined in a Solution, it is selectable in the “List Solutions” dialog, when selecting “Open Solution”. See Connect to Solution database for more information on this dialog.
The currently selected package is displayed in the window’s title bar next to the name of the current project.
Following messages can be prompted for confirmation when you work with a Package:
When saving an item when working with a package you’re prompted to confirm the check out of the affected item. 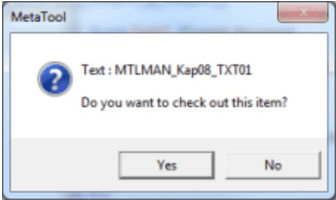
When saving an item checked out to another package you’re prompted to confirm your action. 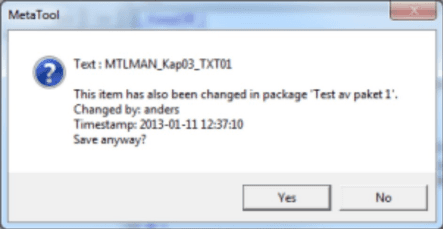
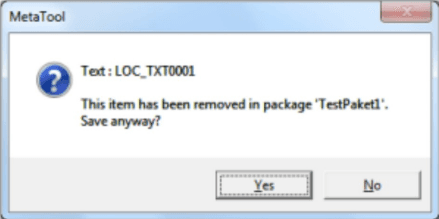
When saving an item marked for delete in another package you’re prompted to confirm your action. 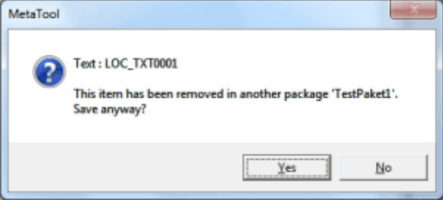
Checked out items can be marked in two different ways:
- Checked out items of the current package are marked with a green plus sign.
- Checked out items of base project package are marked with a padlock and a green plus sign.
- Items checked out from other packages are not visible.
Working with main trunk and one or more packages are open
When working with main trunk and one or more packages are open you may encounter following messages:
When saving an item when working with main trunk and the item has been checked out in any package you’re prompted to confirm saving of the affected item

When saving an item when working with main trunk and the item has been marked fir delete in any package you’re prompted to confirm saving of the affected item
Package items dialog
The “Package Items” button is used to access the dialog:
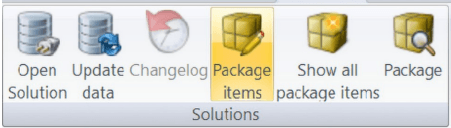
Open “Package Items”
This dialog is used for maintaining the package of the current Solution. The principle task of package management is to merge the items of the package into the main trunk but the dialog is also used for undoing checkouts and to give a comprehensive view of the package’s contents.
Note that the dialog shows the content of the entire package - not just the content of the current project, since a package can span multiple projects.
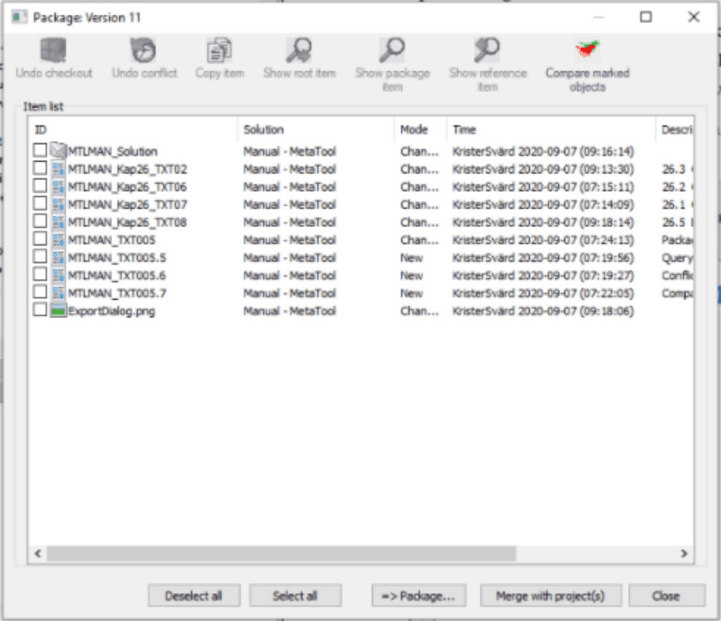
Package Items dialog
| Function | Description |
|---|---|
| Undo checkout | Undo the checkout of selected item. Corresponding item of the main trunk will be used again. |
| Undo conflict | Active when the item from the main trunk has changed after the checkout of selected item. Will update the reference item to current reference item to just avoid the conflict. Conflicting items are marked with a red exclamation mark next to it’s icon. Be cautious! What has happened in the main trunk should probably be reflected in the checked out item. |
| Copy item | Active for changed items. Will remove the item from the package and create a new item in the package with suffix “_COPY”. The item of the main trunk will be the active one again. |
| Show root item | Active when there is a corresponding item in the main trunk. Shows the current status of the root item, that is the status from the checkout if there’s no conflict. |
| Show package item | Shows the selected item from the package. |
| Show reference item | Active when there is a conflict. Shows the status of the root item at the time of the checkout. |
| Compare marked objects | To see what have changed between the root item and the current selected package, the Compare marked objects dialog can be used. First any item that is to be compared needs to be selected. Then additional dialog will be shown. See information under “Compare marked objects” dialog. |
| Deselect all | Any previous selected items are deselected. |
| Select all | All items in the package are selected. |
| ==> Package… | This button is only shown if multiple open packages exists. Any selected items can then be moved to a different package. |
| Merge with project(s) | Main button in the bottom of the dialog. Active when all conflicts are resolved and current user has write authority to all selected item types and projects included in the package. No red exclamation marks! Will merge all changes in the package to the main trunk and if all items was selected it will close the package, else it will remain open and can still be used. A “Closed” package cannot be reopened. |
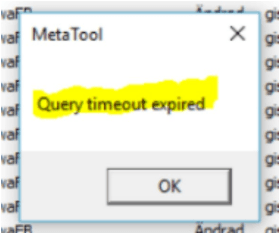
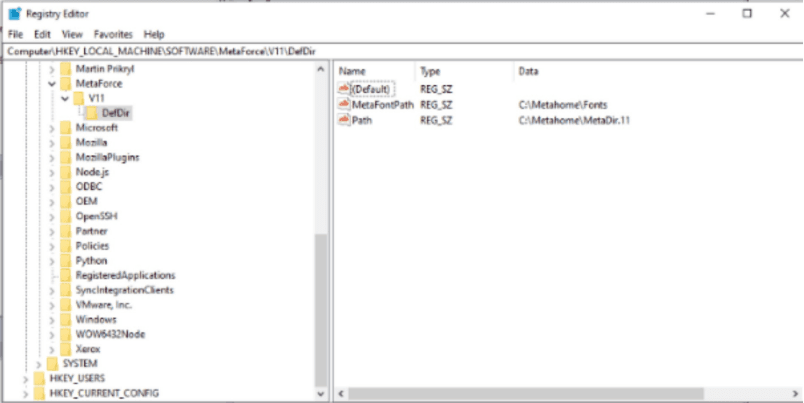
If the merge is aborted with error message “Query timeout expired” you will have to extend the running time for MetaTool by changing the value for TimeOut. This shall be done in RegEdit. The error will only appear when yor package is very large.
[HKEY_CURRENT_USER\Software\Metaforce\Interact v11.0.0\MetaTool\Settings]“DBTimeOut”=1000 (check decimal box before you change the value) . Do this for all your versions by changing the path above. 1000 will let the application run for 1000 seconds.

Conflicting items (= items changed in the main trunk after check out) are shown with a red exclamation mark
=>Package…
This button is only available if the solution contains multiple packages that are open, otherwise this button will not be available.
If pressed a dialog similar to this one is displayed.
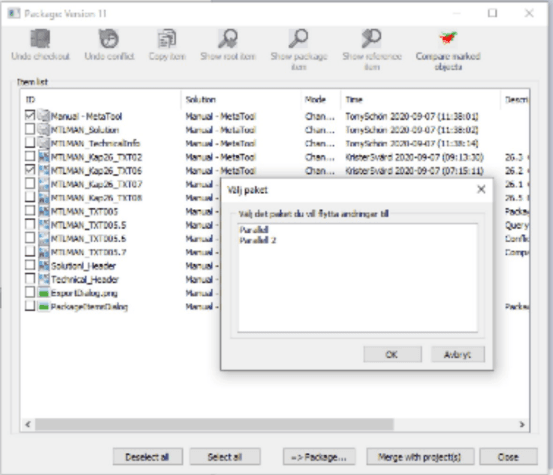
Select the package from the list to which the item should be moved and press Enter.
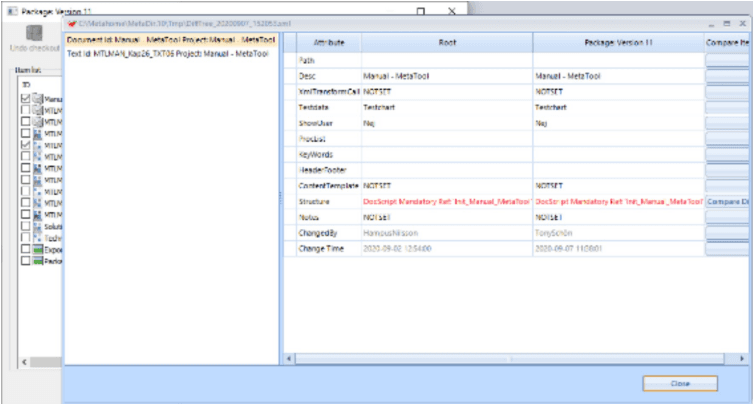
Compare items
Select item(s) that you want to compare against existing item in root level. You cannot compare between different packages. The press the “Compare items” button.
Here three items have been selected and one has been selected
This tools can help greatly to find out what is different between the root item and the one in the current active package.
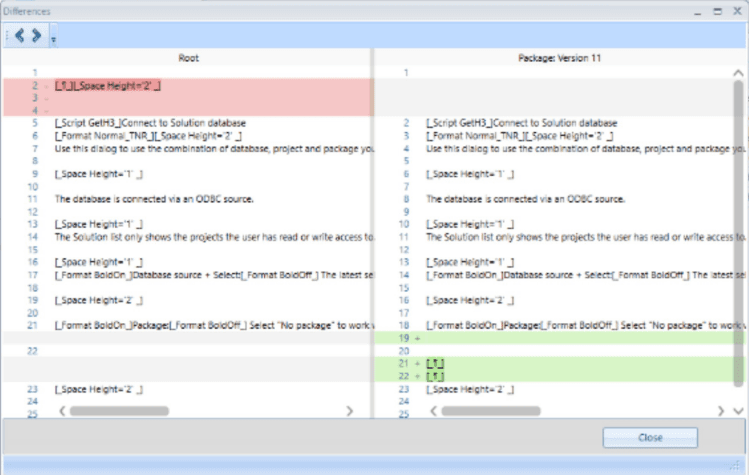
An example how it may look
The dialog will be slightly different depending on what you compare, this shows how it looks when comparing a text item.
Show all package items dialog
The “Show all package items” button is used to access the dialog:

Open “Show all package items”
This dialog is used to view all pending changes in all Packages of all Projects in a Solution. The dialog is Read Only, so no changes to the Solution can be made from here.

Only buttons for viewing are visible.
Export project
Export project is only available when connected to a Solution database.
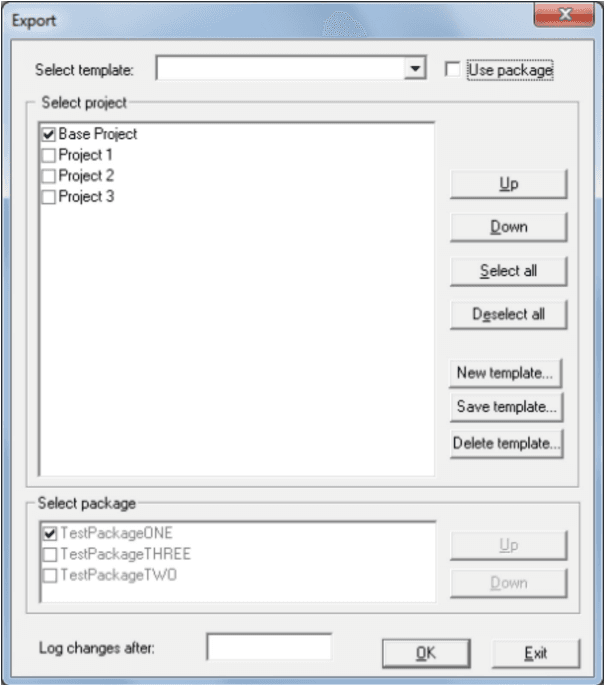
Export project makes it possible to export multiple projects to one combined MetaLogic file. The order the resources/objects are fetch are dependent on the order in the “Select project” list. Use the buttons “Up/Down” to change the order the resources/objects are fetch.
Create a template to save commonly used projects under a defined name. Select a previous defined template from the dropdown list, if no template exists then the dropdown list is empty. User defined template is save in the Solution database.
Export a package
When exporting under a package name then the current package is marked as selected in “Select package” list. If multiple packages exists the “Use package” option becomes available. Checking “Use package” multiple package selection is possible. No buttons regarding the use of “template” is available since a package cannot be part of a template, not even an existing template is available for selection. Default is only the current selected package is included in the MetaLogic file.
If checking “Use package” the option of selecting multiple packages is available, then no buttons related to “template” is available since packages cannot be part of a saved template. Use the “Up/Down” buttons to define the order each package is to be processed.
| Button | Description |
|---|---|
| Up | Moves a project up in the list. |
| Down | Moves a project down in the list. |
| Select all | Selects all projects in the list. |
| Deselect all | De-selects any selected projects in the list. |
| New template | Creates a new export template after prompt for id. |
| Save template | Saves the currently selected template. |
| Delete template | Deletes the currently selected template. |
| OK | Start the projects export. |
| Exit | Exit without exporting projects. |
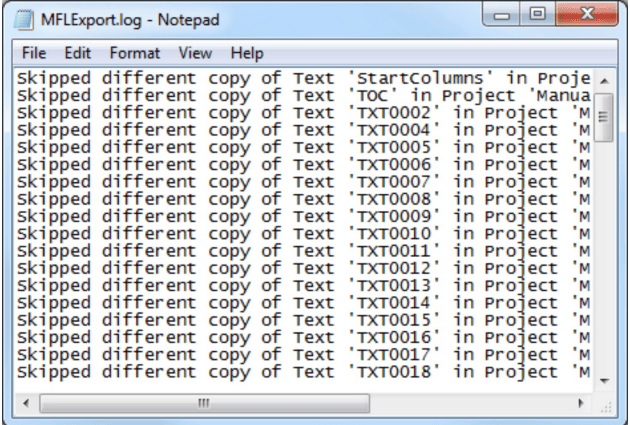
Export log - example.
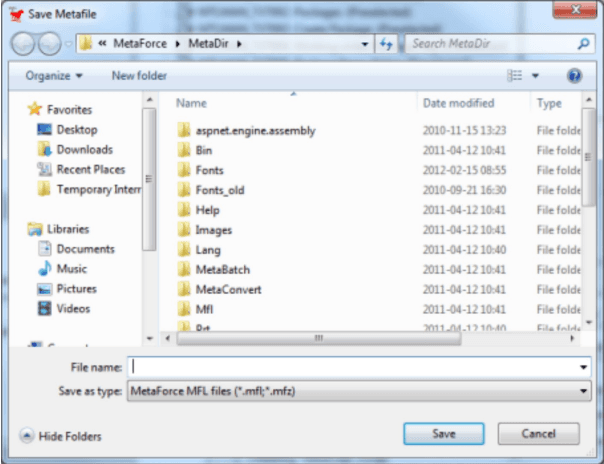
Followed by the Save MetaFile dialog.
Enter the name for the MetaLogic file and press Save.
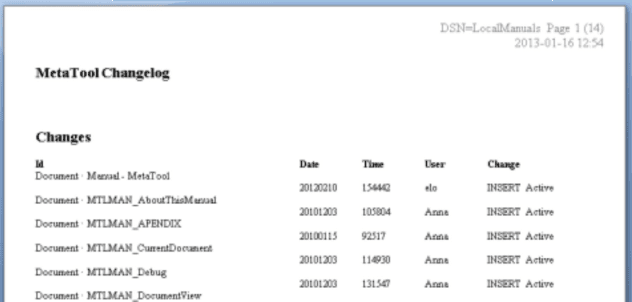
Change log
Change log via selected object
If you choose to create a change log when the database was created, you now have access to an elementary version management tool.
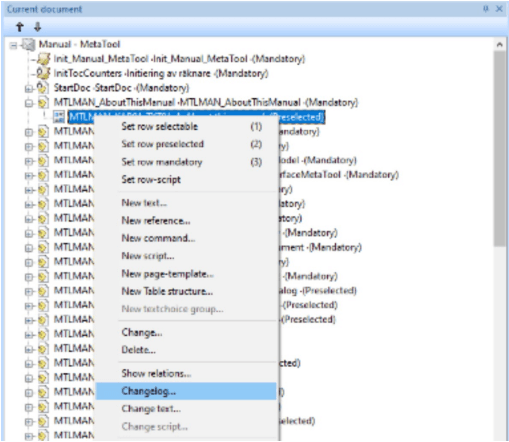
Right click and select Change log for the object you want to see the changes for.
Note: When working within a package you will only see items in current package and no items from main trunk. Use ‘Package items dialog’ to compare items between package and main trunk.
Change log via context menu
The selection Change log opens the dialog box Changelog executing search parameters to make only the versions of the required object to be shown.
Change log - example
In the example there are two versions of a selected text object.
Change log - context menu example
| Function | Description |
|---|---|
| Restore this version… | Restore the selected object. |
| Compare versions… | Open the Version dialog. |
| Show relations… | Show the relations of the selected object. |
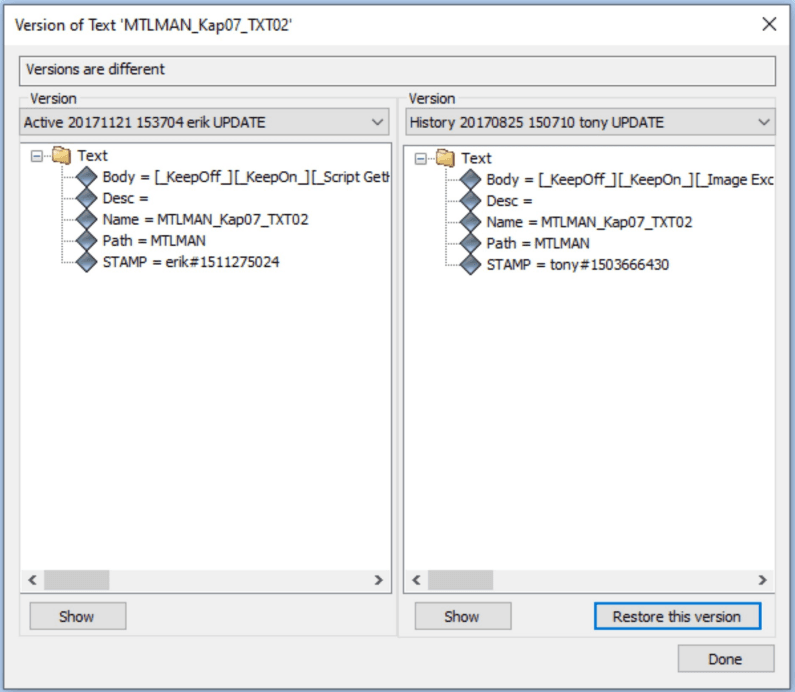
Change log - Compare versions
Change log via menus
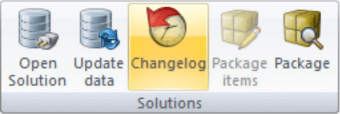
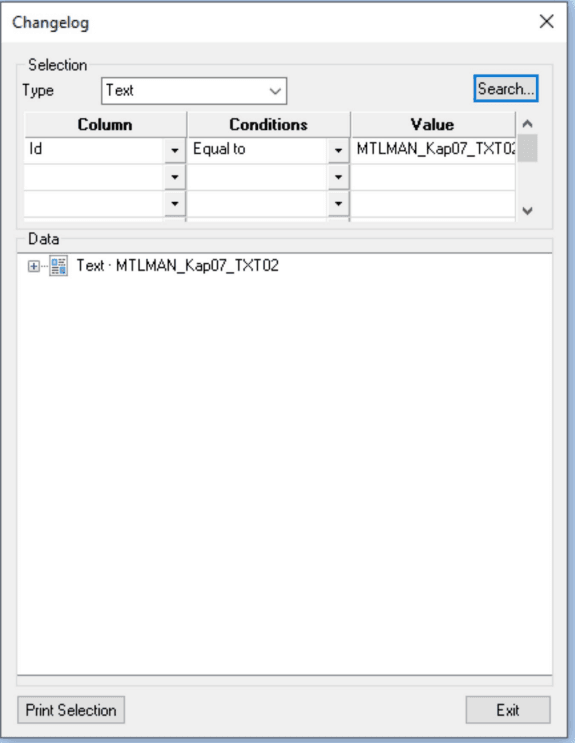
Displays the following dialog.
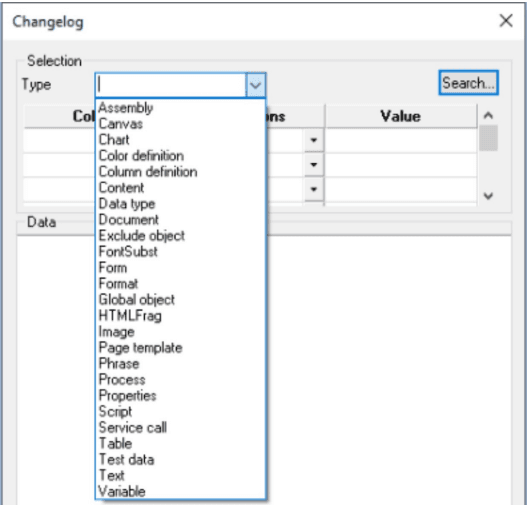
Selection/Type: A drop list with a selection of object types you want to search for.
Selection/Column: A drop list with a selection of columns in the table to be searched for.

Selection/Conditions: A drop list with a selection of search conditions.

Selection/Value: Full text search field for entering search arguments.
Selection /Search… Start searching.
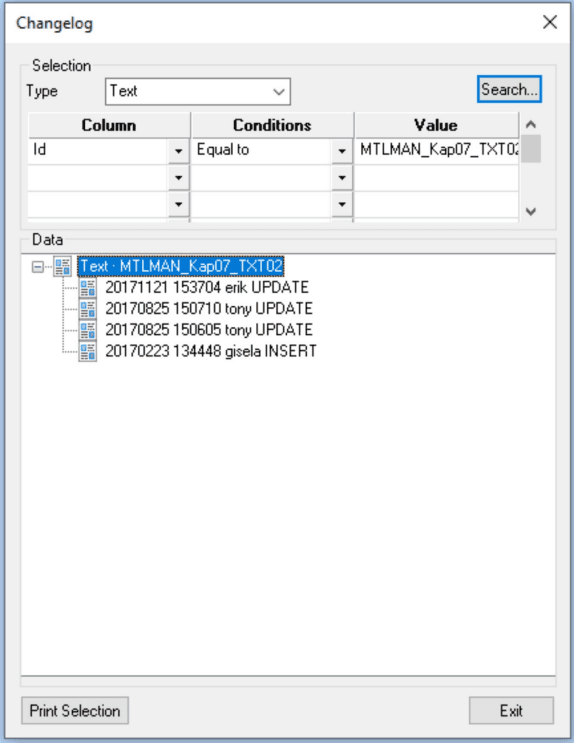
Result after search.
The search in the example has been done without any search arguments which means all objects are returned.
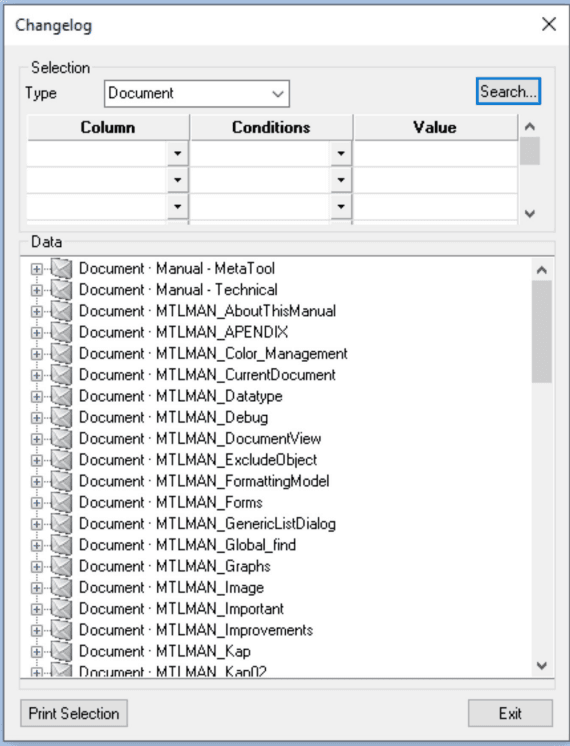
Print selection: Print the current selection to a RTF file to be opened in Word.
Publish to Centerpoint
Button for publish is enabled when:
- Configuration file ‘metaengine.config.cml’ is properly set up. See chapter Metaengine Configuration for details
- You’re working against a project that is enabled for Centerpoint export in the MFSolution application
If you’re not already signed in to Centerpoint, you will be prompted to do so. You will be prompted with a dialog to add a comment to the upload. Be sure to write a good comment when you publish since the comment will follow the release in Centerpoint and will make it easier for you to identity the version of the logic file.
Note 1: The actual name of the logic file as it will appear on the server is set in the MFSolution application
Note 2: If you’re working in a package you will get a warning when you publish to Centerpoint. It is possible to continue if this really is what you want to do.
Transformer (needs a license key)
How it works
At times input data (Xml) that is available is not particular suited for document development. To handle this situation an XmlTransformer program (DLL) can be created to transform the input Xml data and transform it into a more suitable Xml structure for document development.
This program must be written using a .NET language. A programmer versed in Xml programming is needed to create this type of program. These pieces of binary code reside as objects in the MetaLogic and can be added through the Edit ribbon button Assemblies. Enter valid information in the other fields, like name, and description, and search for the DLL by pressing “Select DLL…” button. When found, select it and press OK to complete the import.
Notes:
- If DLL selected is not a valid XmlTransformer an error will be displayed and it will not be imported. Only a valid XmlTransformer can be imported.
- The interface to implement is defined in “Metaforce.Data.XmlTransformer.dll” and this DLL should be referred in the plugin project. This file can be found in the Metaforce bin folder.
- Please, note that it is only possible to define one “ProcKey” per DLL! Not adhering to this rule might result in unpredictable results.
- It’s highly advisable to start fresh with a new project when making a new DLL, to make sure you don’t unintentionally copy any unique entities!
- Please, notice that the name of an assembly object in MetaTool is immutable. This means that it’s OK to change the code, recompile and reimport an assembly but not to change the “ProcKey” as this would change the name of the assembly object.
A minimal example:
using Metaforce.Data;
using System;
using System.Collections.Generic;
using System.ComponentModel.Composition;
using System.Linq;
using System.Text;
using System.Threading.Tasks;
using System.Xml.Linq;
namespace SamplePlugin
{
 [Export(typeof(IXmlTransformPlugin))]
 [ExportMetadata("ProcKey", "SampleConvert")]
 public class Converter : IXmlTransformPlugin
 {
 private XNamespace xs = "http://www.w3.org/2001/XMLSchema";
 private XNamespace xsi = "http://www.w3.org/2001/XMLSchema-instance";
 public XDocument Exec(XDocument xDocIn, XElement xParams)
 {
 XDocument xRet = new XDocument();
 xRet.Add(new XElement("Data"));
 /*********************************************************************
 * Create methods to handle the conversion according to requirements *
 *********************************************************************/
 // Return converted data
 return xRet;
 }
 }
}
Using a Transformer
Transformer DLL must first be imported into the logic file before it can be used. To import a transformer, go to “Edit->Service Call”. Press “Add” button and select XmlTransform from the “Call Type” dropdown menu. From this dialog an assembly is to be chosen for the transformer. The transformer can also have parameters added in this dialog. These parameters will be passed to the DLL for it to consume at will. Some parameters will be added as default at runtime like document name and document keywords. Parameters are passed as an XML with this syntax:
<Params>
<!--Attributes automatically set at runtime-->
<DocumentInfo Description="myDesc " Name="myDocName">
<KeyWord Value="myKeyWord1" />
<KeyWord Value=" myKeyWord2" />
</DocumentInfo>
<!--Parameters set in MetaTool in dialog Service Call->-->
<Param Name="myParam1" Value="myValue1" />
<Param Name=" myParam2" Value="myParam2" />
</Params>
It can now be used in the following way.
-
under test data, create data that have been transformed to be used when developing document.
-
document property, connect a document to a transformer which it should use when run.
When data has been converted by an XmlTransformer; an attribute is then added to the data, named _MF_Transformed_. This attribute is used to ascertain that the XmlTransformer is not called on data that have already been converted.
If an error occurs in the XmlTransformer it will be reported back as error.
Updating an existing assembly
When updating an existing assembly it is strongly adviced to refresh current test data in order to refresh the in memory loaded assembly.
Service Call / Transfomer dialog
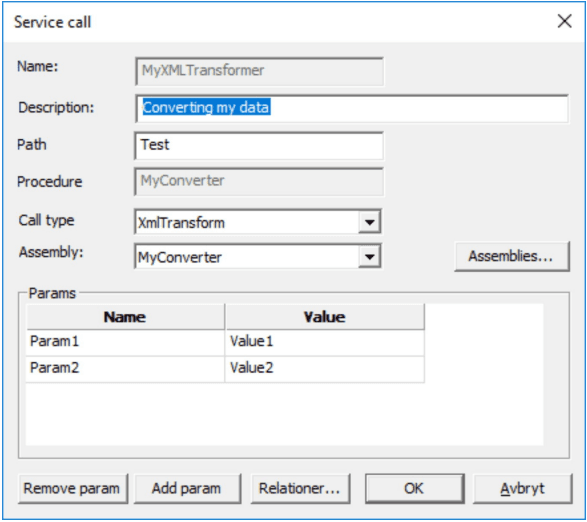
To create an XMLTransform first select ‘XMLTransform’ in combolist ‘Call type’. Then select Assembly in combolist ‘Assembly’.
Assembly dialog
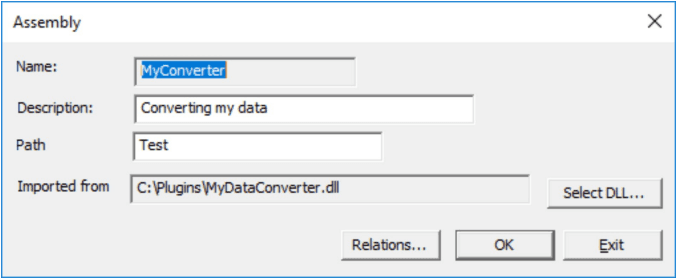
To load assembly push button ‘Select dll’. The selection will set ‘Name’ to exported ProcKey from the dll and can never be changed.
Technical Information
PDB files included in installation media
The installation media of Interact version 11 contains PDB (Program Database) files generated in the build process. These PDB files will ease the analysis process when Metatool or Metaengine crashes to desktop. Follow the instructions documented by Microsoft to generate a crash dump when Metatool or Metaengine crashes to desktop.
https://learn.microsoft.com/en-us/windows/win32/wer/collecting-user-mode-dumps?redirectedfrom=MSDN
Limitations, definitions and “well known” gotchas
Font Tracking
Metaforce definition of Font Tracking is that it alters the advance width of each character/glyph without changing the apperance of the character/glyph, while trying to stay close to InDesign’s way of doing it. Minor discrepancies of proper values between the two systems may be noticed, however.
- TextBox - Font Tracking will not work properly in a TextBox if the TextBox is rotated. Only 0 degrees rotation is supported.
- Forms - Font Tracking will not work in the Forms editor preview. It will however work when generating the document.
- Font Style dialog - Font Tracking will not be shown in the font proview in the Font Style dialog.
- Font tracking in combination with PDF fields - Using a font with Font Tracking on a PDF field (input elements, URL links) will lead to a redefinition of the field as a normal text string in the resulting PDF file. It is not possible to use Font Tracking in combination with PDF fields.
- Font tracking does not work in conjunction with the WebEditor.
AutoValues and lists
The following object types are AutoValues:
- The various kinds of page and section counters
- Hyperlink (variable)
- AutoDate (variable)
The following AutoValues will work correctly in a list:
- Hyperlink (variable)
- AutoDate (variable)
Page and section counters will not work in texts with paragraph property ‘Indent’ set to anything other than zero.
Lines
Lines are positioned in the center of the line in the Y-coordinate.
Z order and tables and lines
The Z order of a table object and lines might lead to surprises if one uses table objects and dynamic lines. Do not mix these together, use the built in support for lines in the table object itself.
PDF/UA limitations
While links will still work as usual, following limitations applies to PDF/UA:
- Links on Images and Canvases will not be represented as PDF/UA.
- Links residing on running headers/footers will not be represented as PDF/UA
When StartUACollection() has been called in a document running headers/footers must be explicitly declared. This is in contrast to a regular document where omitting running headers/footets will automatically reuse first headers/footers for the consecutive pages. To have same headers/footers for all pages you have to declare them twice. To just have first header/footer you’ll have yo declare empty running headers/footers.
If running headers/footers are not declared on a document that has called StartUACollection, running headings/footers will be discarded and a warning will be displayed:
Beware that this is just a warning and will not stop Metaengine from generating a PDF. The generated PDF is however invalid and might be incorrectly handled in your PDF viewer so please adhere to the warning and fix the issue!
Running Interact in Linux container
As of version 11.5.0, Interact will run as a service in a Linux container. The implementation has been done with Wine as a shim on top of the Linux kernel. One should expect some performance penalty compared to a pure Windows installation. There are limitations and the only services tested and verified are the following SOAP services:
- Generating DXML for the Editor
- Generating PDF from either data or DXML
Any other service or program have not been tested.
Here are known limitations in the Linux implementation:
- AFP is not supported and as such have not been tested. The RGB to CMYK separation is not supported.
- PostScript is not supported.
- Batch is not supported. Neither the PPA nor the MetaBatch programs have been converted to run in Linux.
- Dynamo is not supported.
- MetaWrite is not supported.
- Data types Currency, ShortDate and LongDate will produce different results om Windows and Linux. To overcome this, use the custom formatting in the Language dialog (new for ver 11.5.0).
- JScript might behave differently on Linux. Calls to COM-objects might not work on Linux.
- Built in JScript functions might behave differently. For instance a boolean returns the string “True” on Windows but -1 on Linux. Other gotchas might have a bigger impact…
- As the level of freedom is huge when writing JScript, we’ve not been able to spot every issue that might occur. It’s necessary to test the logic file in a Linux environment to see how it behaves!
- Logic files that will be deployed to Linux must have the “Export for Linux” checkbox ticked when saved or exported from MetaTool.
- Logic files exported for Linux are not possible to reimport into Metatool or Solutions.
- XML files (AXML and DXML) produced by Windows and Linux MetaEngine’s are not interchangeable. It will not be possible to parse from the opposite system.
- Images in PDF’s and XML’s will be binary different in Windows and Linux due to different compression algorithms. They appearance should however be virtually indistinguishable from each other.
Debugging
Overview
When debugging your scripts, it is recommended to do it with a debugger. When checking Debug in the preview pane or in the properties dialog, MetaTool automatically inserts a function in your script containing a programmatic breakpoint. This function will be called every time you render your document as long as Debug is checked and causes the execution to be breakable by an installed debugger. Letting MetaTool take care of the insertion of a debug break, ensures you don’t leave any debug breaks in production code, as this code never is saved to the MetaLogic file.
Depending on your debugger or on your preferred workflow, you can attach the MetaTool process to your debugger or rely on the operative system to recognize your installed debugger (if any recognizable) and prompt you to choose a debugger to execute when the breakpoint is hit.

No debugger attached to MetaTool but OS has recognizable debuggers to offer when a breakpoint is hit
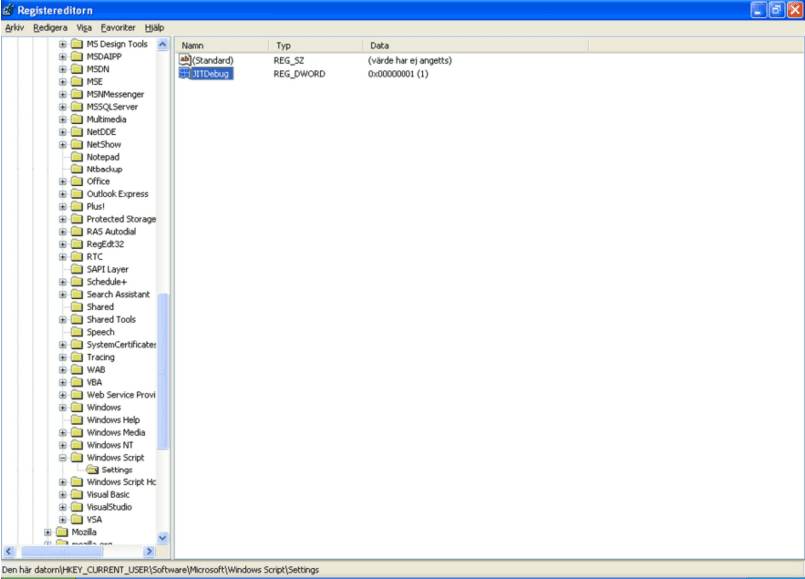
Registry update
To allow debug breakpoints in scripts to be caught by the operative system make sure that the following Registry entry is set:
(HKEY_CURRENT_USER/Software/Microsoft/WindowsScript/Settings).
JITDebug
should be 1.
Improvements
New in Metaforce version 11.7
- Added 2 new tags: non breaking space and tab. They both show up as selectable options when right clicking in the TextEditor
- Improvements importing PDF-files as overlays, now you can include images and vector objects
- Added the ability to publish logic files via Centerpoint and start the WebEditor directly from Metatool.
- Made the WebEditor fully User Accessibility compliant.
New in Metaforce version 11.6
- Improvements viewing Solutions objects in Metatool
- Improvements handling variables in combination with the WebEditor
- Added the ability to configure MetaEngine to take the first text in a TextChoice bundle when creating a ondemand document
- Added the ability to start a WebEditor document instance directly from Metatool
- Improvements importing PDF-files as overlays
- Improvements in PDF/A generation
- Improvements when generating MFDX-files in batch
New in Metaforce version 11.5
- Added channel configurations
- Added the ability to define and override built in behaviors for data types CURRENCY, SHORTDATE and LONGDATE in Language dialog
- Added the ability to run Interact in Linux container (with limited functionality)
New in Metaforce version 11.4
- Added new paragraph tag
- Added the ability to configure spaces between list items
- Added the ability to add keywords on texts and corresponding SOAP operations to get all texts based on filters and all keywords defined
New in Metaforce version 11.3
- Added the ability to import SVG vector graphics
- Added the ability to import PDF as overlays, this will depricate the old Adobe Acrobat plugin (it will be removed in a future release) :)
New in Metaforce version 11.1
- Added Interact Test
- Added webbased Metawrite application called WebEditor
- Added Font Tracking
New in Metaforce version 11
- Since the release of version 10 there have been a number of improvements done. Here’s a summary. For details look in the release notes.
- All projects converted to VS2019 which leads to new C/C++-runtime.
- All .NET-projects upgraded to .NET 4.7.2.
- All Windows GUI applications have high resolution support (System Aware)
- All manuals have been through a revision
- Added the ability a link to images and vector objects
- PDF-fields
- MetaWrite
- Support for Content/HTML
- New SOAP-operations: GS_ConvertPdfToAXML, GS_CreateAndLoadDocument
- Data converter, .NET assembly hosted in Metalogic file that converts domain data to view data
- Solutions and package has been enhanced
- Support for PDF/UA
New in Metaforce version 10
Installation now requires a license file that opens up your installation has access to.
Metaforce Interact is from version 10 x64 only, meaning it is only compatible with x64 hardware. It also affects application pools in IIS that shouldn’t be set to 32-bit any more.
As usual this major release is possible to reside side by side with other major releases of Metaforce, whether registered nor not.
This version is built with Microsoft Visual Studio 2015, and uses the 2015 runtime as well as .Net 4.5.2.
Major new feature of this release are:
- Interact now built for x64 architecture to significantly improve memory performance.
- Interact is from this version delivered with a customer specific license file, that is required to execute the system.
This version is possible to reside side by side with other versions of Metaforce, whether they are registered nor not.
New in Metaforce version 9
This is a major release that affects all Metaforce programs, the MetaLogic format. This version is possible to reside side by side with other versions of Metaforce, whether they are registered nor not.
The new version is built with Microsoft Visual Studio 2013 and uses that runtime.
MetaLogic conversions:
All MetaLogic files and Solutions need to be converted to the latest version.
Automatic conversion is done by MetaTool and MFSolution.
Major new feature of this release are:
- Support for import of CMYK images.
- Support for pure CMYK workflows without ICC-profiles.
- Support for vector graphics.
- Color definitions. Could now be used with any color setting on any object except business graphics. Mandatory on vector graphics and in general when using CMYK colors.
- Data types and “typed scripts” to be used for output formatting. Built in capabilities for numbers, dates and currency.
- Smaller memory footprint and improved performance.
Please, note that due to change of the imaging framework, scaling and dithering algorithms have been changed.
The implications of this are that any settings done on individual images prior to v9 will be discarded. This is true for the print config settings as well. Typically this will not cause any problems, as the default settings suffice in most cases.
New in Metaforce version 8
From Metaforce version 8.0 most programs handle Unicode. Another change is that MetaEngine doesn’t need any AFP charset, AFP code page or Type1 font. These resources are generated on the fly from an OpenType typeface and optimized to contain only necessary glyphs for the specific printfile generated.
Be aware that when bringing new typefaces to the “table”, the new AFP charset names impact on AFP-viewers and AFP-transformers. Please read and understand the section named “Naming logic AFP charset” below in order to understand how to configure your viewer/transformer.
Typefaces, fonts, code pages and encoding
From Metaforce version 8.0 most programs handle Unicode. Another change is that MetaEngine doesn’t need any AFP charset, AFP code page or Type1 font. These resources are generated on the fly from an OpenType typeface and optimized to contain only necessary glyphs for the specific printfile generated.
Be aware that when bringing new typefaces to the “table”, the new AFP charset names will have an impact on AFP-viewers and AFP-transformers. Please read and understand the section named “Naming logic AFP charset” below in order to understand how to configure your viewer/transformer.
Supported typeface formats
MetaEngine handles ordinary OpenType outlines (CFF/PostScript and TrueType) with normal OpenType features.
If an OpenType file contains an unsupported feature you will get a clear indication/error message. Contact Metaforce Support if you have any issues.
Error handling
If a character is missing, the character will be converted from Unicode to Single Byte. This results in some cases that, for example, Eastern European characters are converted to the corresponding adjacent Western European. If the transformed character is available in the font, it will be used but if the character cannot be transformed, or if the converted character is missing in the font, “space” will be used instead. In these cases, a warning will be written. If “space” also should be missing an error will be reported.
MetaWrite/DOCX specifics
When a document is generated for editing in a MetaWrite-process, a DOCX-file is generated. The DOCX-file does not contain any embedded typeface but refers to typefaces installed on the client machine. Therefore it’s highly important that the target clients have exactly the same typefaces you aim to use in your documents. If not, the end result can be something else than expected.
PostScript specifics
The PostScript files that MetaEngine generates are Single Byte. This means that MetaEngine will read Unicodedata and transform data into Single Byte on the fly. The typefaces that are generated are in the Type1-format and will only contain necessary characters/glyphs for the printjob.
AFP specifics
The AFP-files that MetaEngine generates are Single Byte. This means that MetaEngine will read Unicode-data and transform data into Single Byte on the fly.
Internal AFP metadata (TLE tags, resource names and other) is always encoded in EBCDIC 500. This obviously means that Unicode characters outside of this encoding will be dropped…
AFP code page
MetaEngine will automatically generate necessary AFP code pages needed for the printfile.
The following well known AFP code pages are generated:
| AFP code page | Region |
|---|---|
| 1038 | Symbol |
| 1250 | Latin 2 / Central European |
| 1251 | Cyrillic |
| 1252 | Latin 1 / Western European |
| 1253 | Greek |
| 1254 | Turkish |
| 1255 | Hebrew |
| 1256 | Arabic |
| 1257 | Baltic |
| 1258 | Vietnamese |
Any character that cannot be represented in these AFP code pages will end up in an AFP code page that isn’t known in advance and in the order they appear. The naming of the AFP code page will start with 10000 and once this AFP code page is full the next AFP code page will be named 10001.
Naming logic AFP charset
The name of the AFP charset is always 8 characters long. The first 2 characters are always “CZ”, the next 4 characters are configurable and must be any of the following characters: [A-Z0-9]. The combination must also be unique for the font collection (Fonts.xml). If one choose not to do any configuration MetaEngine will autogenerate a 4 character long value that is unique within the printfile. The next 2 characters depends on the characters the AFP charset contains.
The following names are generated:
| AFP code page | Character |
|---|---|
| 1038 | AB |
| 1250 | AC |
| 1251 | AD |
| 1252 | AE |
| 1253 | AF |
| 1254 | AG |
| 1255 | AH |
| 1256 | AI |
| 1257 | AJ |
| 1258 | AK |
| 10000 | AL |
| 10001 | AM |
| … | … |
| 10294 | LT |
The last AFP code page generated is 10294 and the characters are LT.
As an example where the configurable part is “ABBA” and the print job contains characters from the AFP code pages 1251, 1252 and 10000, the following AFP charsets will be generated:
CZABBAAD, CZABBAAE and CZABBAAL.
Understanding IDE layout
The IDE will give users a highly functional, flexible, and efficient tool, that allows the user to:
- Reduce the number of unused panes displayed at one time.
- Easily customize the user layout to his/her preferences.
- Maximize the user workspace for document design and management.
Each pane can be manipulated and the user can easily access the tool panes they use frequently. Users can control how much space they want to allocate to the different panes, and can maximize the space available for document design. Panes can be moved to different locations in the IDE, they can be undocked, and dragged out of the MetaTool IDE; this is particulary useful when using more than one monitor.
When starting the MetaTool IDE for the first time one gets the default layout. The next time the MetaTool is started the last used layout will be active. The default layout can be restored by selecting “Restore default layout at program start” under chapter Preferences.
Another feature that is central to the MetaTool IDE is the tool ribbon. The ribbon groups action, called contextual tabs, in an easy accessed manner. The “ribbon” can be minimized to maximize the work area.
A Quick access toolbar contains most common action, which the user can configure and the MetaTool button, which common file action can be found. It also have a recent file list.
Unicode
How Unicode is handled by Metaforce:
- The XML support is limited to UCS-2, that is only double byte and no support for surrogates.
- MetaEngine only supports left to right text directionality formatting.
- Metaforce always writes XML to disc as UTF-8. (Exception for debug in files, can be UTF-16 without XML declaration).
- Communication between script in logic files and MetaEngine is always UTF-16.
- MetaLogic stored in a database solution is stored as UTF-16 but without XML specification to save space.
- Metaforce can read XML encoded as UTF-8, UTF-16 , Windows 1250, Windows 1251, Windows 1252, Windows 1253, Windows 1254, Windows 1255, Windows 1256, Windows 1257 and Windows 1258.
Caveats when using Unicode:
- Data XML as well as MetaLogic must strictly adhere to XML standards. This means that XML attribute names and content must follow the XML standard. This could typically only cause problems in old MetaLogic in the Test data, where it was possible to use space and slash in attribute names - both illegal in XML names. Existing MetaLogic might also contain illegal characters i.e characters under decimal 32 other than tab, line feed or carriage return.
- Logic files, breaking the XML standards, will not be possible to convert to version 8 without fixing these errors first.
Output Channel Configuration
When defining and developing document logic you should (as far as possible) develop documents as general as possible in respect to limiting demands from various output channels. These limiting demands should be handled as late as possible when the document is being generated.
The limitations can be configured in the output channel configuration. For instance image transforming operations like resolution and color space can be performed in the output channel configuration. It is also in the output channel configuration that modifications to control input and output bins and more are configured.
The output channel configuration file, together with the possibility to use exclusion on images and electronic forms, gives great functionality to handle various output channel needs.
The original configuration file is found under “MetaDir/Prt/Conf” and is named “PrtConfig.xml”. In the standard version there are some predefined output channel configurations. These configuration files can, and should, be modified to suit the needs of every installation.
XML Structure and Attributes
This section describes the structure and the meaning of various attributes and how to configure them.
XML Structure
<?xml version="1.0" encoding="windows-1252"?>
<Printers>
 <Config Name="" OutType="" Simplex="" ImageColor="" OperandColor="" Desc="">
 <ImageConversion ResizeMethod="" DitheringMethod="" XResolution=""
 YResolution=""/>
 <Watermark ImageSource="" X="" Y=""/>
 <OCAColors>
 <OCAColor RGB="" OCA=""/>
 </OCAColors>
 <Inputbins>
 <Bin Name="" OutName=""/>
 </Inputbins>
 <Outputbins>
 <Bin Name="" OutName=""/>
 </Outputbins>
 <SpecialSettings ImgSubst="" Mime="" Ext="" />
 </Config>
</Printers>
Attribute - Config / Name
Name valid values
 "Any valid XML value"
The name of the output channel configuration.
Attribute - Config / OutType
OutType valid values
 "AFP"
 "MFDX"
 "PDF"
 "PDFA"
 "PS"
 "XML"
 "DXML"
 "EMF"
The “OutType” attribute defines the output format that is generated when using the output channel configuration.
Attribute - Config / Simplex
Simplex valid values
 "1"
 ""
If set to “1” the “Simplex” attribute will force all pages in a document to be generated as simplex pages even though the document logic in the page template is defined to use duplex.
Attribute - Config / ImageColor
ImageColor valid values
 "BW"
 "RGB"
 "CMYK"
The “ImageColor” attribute controls the color space images are generated when using the output channel configuration.
Since Metaforce version 5.0.2 all AFP color images that are generated are in the form of IOCA FS45 CMYK image format.
Attribute - Config / OperandColor
OperandColor valid values
 "BW"
 "RGB"
 "CMYK"
The “OperandColor” attribute controls the color space of texts, lines and other vectorized objects when using the output channel configuration. This attribute is only valid when attribute “OutType” is set to AFP
Attribute - Config / Required
Required valid values
 "True"
 "False"
The “Required” attribute controls the conversion of color codes. This attribute is only valid when attribute “OutType” is set to PDF or SC.
Attribute - Config / Desc
Desc valid values
 "Any valid XML value"
The “Desc” attribute should be used to give the output channel configuration a natural description.
Attribute - ImageConversion / ResizeMethod
ResizeMethod valid values
 "NearestNeighbor"
 "Linear"
 "Cubic"
 "Fant"
 ""
The attribute “ResizeMethod” decides which resize filter the image engine will use when lowering the resolution of an image for the output channel configuration. For instance when transforming a 300 by 300 DPI image to a 96 by 96 DPI image.
Attribute - ImageConversion / DitheringMethod
DitheringMethod valid values
 "None"
 "ErrorDiffusion"
 ""
The attribute “DitheringMethod” controls which transform filter the image engine will use when lowering the image bit depth of an image for the output channel configuration. For instance when transforming a 24 bit RGB image to a 1 bit bilevel image.
Attribute - ImageConversion / XResolution + YResolution
XResolution/YResolution valid values
 "72-600"
The attributes “XResolution” and “YResolution” controls image resolution generated for the channel configuration.
Attribute - ImageConversion / ColorConversion / InputICC
InputICC valid values
 File name of a valid ICC-profile
The attribute “InputICC” names the ICC-profile that specifies the color profile of the input image
Attribute - ImageConversion / ColorConversion / OutputICC
OutputICC valid values
 File name of a valid ICC-profile
The attribute “OutputICC” names the ICC-profile that specifies the color profile of the output image
Attribute - Watermark / ImageSource
ImageSource valid values
 "Any valid name of an image to be used as watermark"
The watermark will print the named image on every page on every document generated using the output channel configuration. There can only be one watermark node in one output channel configuration. The “ImageSource” attribute should point to an image residing in the image directory
Attribute - Watermark / X + Y
X/Y valid values
 "A positive number less than the size of a page"
The ”X” and ”Y” attributes controls where on the pages the watermark image is positioned using the output channel configuration. The values must be within the size of the page and expressed in millimeters.
Attribute - Watermark / TextBox
TextBox valid values
 "Any valid TextBox values"
The watermark will print the text specified on every page on every document generated using the output channel configuration. There can only be one watermark node in one output channel configuration. The font for the text can be supplied by the font attribute.
Attribute - OCAColors / OCAColor / OCA
OCA valid values
 "Blue"
 "Red"
 "Pink"
 "Green"
 "Turquoise"
 "Yellow"
 "White"
 "Black"
 "Dark blue"
 "Orange"
 "Purple"
 "Dark green"
 "Dark turquoise"
 "Mustard"
 "Gray"
 "Brown"
OCA colors are a number of predefined colors in IBM AFP. Please refer to the IBM manual ?SC31-6802 Mixed Object Document Content Architecture Reference (MODCA)” for more information about OCA colors.
The OCA colors are only applicable if attribute “OutType” is set to “AFP” and the attribute Operand Color is set to “RGB”.
Attribute - OCAColors / OCAColor / RGB
RGB valid values
 "0-255;0-255;0-255"
OCA colors are a number of predefined colors in IBM AFP. Please refer to the IBM manual “SC31-6802 Mixed Object Document Content Architecture Reference (MODCA)” for more information about OCA colors.
The OCA colors are only applicable if attribute “OutType” is set to “AFP” and the attribute Operand Color is set to “RGB”.
Attribute - Inputbins / Bin / Name
Name valid values
 "0-8"
The number of the input bin to be configured in the node. This number refers to the number of the input bin that is set when defining a page template in MetaTool.
Attribute - Inputbins / Bin / Outname
Outname valid values
 "Any valid XML value"
When attribute “OutType” is set to “AFP” the content of the attribute “Outname” must be a positive integer as defined in AFP. When attribute “OutType” is set to “PS” (PostScript), the content of the attribute “Outname” should contain a valid PostScript command for calling paper from the preferred input bin. The command can be different between printer types and brands.
Attribute - Outputbins / Bin / Name
Name valid values
 "0-3"
The number of the output bin to be configured in the node. This number refers to the number of the output bin that is set when defining a page template in MetaTool.
Attribute - Outputbins / Bin / Outname
Outname valid values
 "Any valid XML value"
When attribute “OutType” is set to “AFP” the content of the attribute “Outname” must be a positive integer as defined in AFP. When attribute “OutType” is set to “PS” (PostScript), the content of the attribute “Outname” should contain a valid PostScript command for sending the paper to the preferred output bin. The command can be different between printer types and brands.
Attribute - SpecialSettings / ImgSubst
ImgSubst valid values
 "0-2"
When attribute “OutType” is set to “PS” the attribute “ImgSubst” can be set to 0 or 1.
| Function | Description |
|---|---|
| 0 | meaning default image handling. |
| 1 | meaning include external image (on disk in Metaforce image directory) inline in the output file. |
| 2 | meaning refer to external image on disk. |
Values 1 and 2 must be used in conjunction with attributes “Mime” and “Ext”
Attribute - SpecialSettings / Mime
Mime valid values
 "The valid mime type of image"
When attribute “ImgSubst” is set to either “1” or “2”, the value of the attribute “Mime” is written as the mime type in the output file. Mime examples are “application/postscript” and “image/tiff”.
Attribute - SpecialSettings / Ext
Ext valid values
 "The extension of the image file"
When attribute “ImgSubst” is set to “1”, the value of attribute “Ext” is used in conjunction with the name in the document logic to identify the name of the file being included in the output file. For example if the image name in the document logic is “Theimage” and the value of the attribute “Ext” is “.eps”, the generated file name would be “Theimage.eps”.
When attribute “ImgSubst” is set to “2”, the value of attribute “Ext” is used in conjunction with the name in the document logic to create the name being referred to in the output file.
Attribute - SpecialSettings / InnerType
InnerType valid values
 "PDFA"
Attribute “InnerType” must be used together with attribute “ICCProfile” and in combination with OutType=“MFDX” in order to get PDF/A instead of normal PDF.
Attribute - SpecialSettings / ICCProfile
ICCProfile valid values
 "The path to the ICC profile file"
Attribute “ICCProfile” is used with OutType=“MFDX” and OutType=“PDFA”.
Attribute - SpecialSettings / IncludeFields
IncludeFields valid values
 1
Attribute “IncludeFields” is used with OutType=“PDF”. It will generate PDFs with input fields. This functionality is protected under licens.
Attribute - SpecialSettings / RasterizeCanvas
RasterizeCanvas valid values
 1
Attribute “RasterizeCanvas” is used with OutType=“AFP”. It will convert vector objects to AFP IOCA images.
Attribute - SpecialSettings / AllowBezier
AllowBezier valid values
 1
Attribute “AllowBezier” is used with OutType=“AFP”. It will pass bezier curves to AFP GOCA objects. The normal operation is to convert bezier curves to line objects. Setting RasterizeCanvas to 1 will override this setting and generate AFP IOCA images instead of AFP GOCA objects.
Attribute - SpecialSettings / WebEditor
WebEditor valid values
 1
Attribute “WebEditor” is used with OutType=“DXML”. See description for all attributes that the WebEditor attribute has replaced.
Attribute - SpecialSettings / ImageAsPng - Deprecated and replaced by the WebEditor attribute
ImageAsPng valid values
 1
Attribute “ImageAsPng” is used with OutType=“DXML”. It will convert images to PNG format in the DXML output.
Attribute - SpecialSettings / ContentInfoWebEditor - Deprecated and replaced by the WebEditor attribute
ContentInfoWebEditor valid values
 1
Attribute “ContentInfoWebEditor” is used with OutType=“DXML”. It will add more content regarding fonts info in DXML output.
Attribute - SpecialSettings / CollectContent - Deprecated and replaced by the WebEditor attribute
CollectContent valid values
 1
Attribute “CollectContent” is used with OutType=“DXML”. It will add content info in DXML output.
Attribute - SpecialSettings / DisablePageIndex
DisablePageIndex valid values
 1
Attribute “DisablePageIndex” is used with OutType=“AFP”. It will disable TLE-tags on page level.
Attribute - SpecialSettings / ForceIMM
ForceIMM valid values
 1
Attribute “ForceIMM” is used with OutType=“AFP”. It will generate an IMM on every page break.
Attribute - SpecialSettings / WriteTextPartMetaData - Deprecated and replaced by the WebEditor attribute
Inlcude metadata in DXML
 1
Attribute “WriteTextPartMetaData” is used with OutType=“DXML”. It will include metadata from StandardTexts like Name, Description and KeyWords.
Examples
This section gives some examples of output channel configurations.
AFP With Spotcolor
<?xml version="1.0" encoding="windows-1252"?>
<Printers>
 <Config Name="Spotcolor" Simplex="" OutType="AFP" ImageColor="BW" OperandColor="RGB" Desc="Presented in
GUI">
 <ImageConversion ResizeMethod="" DitheringMethod="TRIANGLE" XResolution="300" YResolution="300"/>
 <OCAColors>
 <OCAColor RGB="255;0;0" OCA="Red" />
 <OCAColor RGB="0;0;255" OCA="Blue" />
 </OCAColors>
 <Inputbins Comment="Maximum inputbins in AFP (MODCA) are 255. Metaforce has set a limit for AFP at
8...">
 <Bin Name="0" OutName="0"/>
 <Bin Name="1" OutName="1"/>
 <Bin Name="2" OutName="2"/>
 <Bin Name="3" OutName="3"/>
 <Bin Name="4" OutName="4"/>
 <Bin Name="5" OutName="5"/>
 <Bin Name="6" OutName="6"/>
 <Bin Name="7" OutName="7"/>
 <Bin Name="8" OutName="8"/>
 </Inputbins>
 <Outputbins Comment="Maximum outputbins in AFP (MODCA) are 65536. Metaforce has set a limit for AFP
at 3...">
 <Bin Name="0" OutName="0"/>
 <Bin Name="1" OutName="1"/>
 <Bin Name="2" OutName="2"/>
 <Bin Name="3" OutName="3"/>
 </Outputbins>
 </Config>
</Printers>
The above output channel configuration named “Spotcolor” will generate documents in AFP output format with OCA colors Red and Blue when texts, lines and rectangles are defined as RGB “255;0;0” and “0;0;255” respectively. It will also generate 300 by 300 DPI bilevel images using the dithering method called TRIANGLE.
AFP With ICC Profile
<?xml version="1.0" encoding="windows-1252"?>
<Printers>
 <Config Name="AFP ICCP" OutType="AFP" ImageColor="CMYK" OperandColor="CMYK" Desc="">
 <ImageConversion ResizeMethod="BELL" DitheringMethod="" XResolution="300" YResolution="300">
 <ColorConversion InputICC="ICC Profiles\sRGB_v4_ICC_preference.icm" OutputICC="ICC
Profiles\CoatedFOGRA39.icm" />
 </ImageConversion>
 <SpecialSettings Dummy=""/>
 <Inputbins Comment="Maximum inputbins in AFP (MODCA) are 255. MetaForce has set a limit for AFP at
8...">
 <Bin Name="0" OutName="0"/>
 <Bin Name="1" OutName="1"/>
 <Bin Name="2" OutName="2"/>
 <Bin Name="3" OutName="3"/>
 <Bin Name="4" OutName="4"/>
 <Bin Name="5" OutName="5"/>
 <Bin Name="6" OutName="6"/>
 <Bin Name="7" OutName="7"/>
 <Bin Name="8" OutName="8"/>
 </Inputbins>
 <Outputbins Comment="Maximum outputbins in AFP (MODCA) are 65536. MetaForce has set a limit for AFP
at 3...">
 <Bin Name="0" OutName="0"/>
 <Bin Name="1" OutName="1"/>
 <Bin Name="2" OutName="2"/>
 <Bin Name="3" OutName="3"/>
 </Outputbins>
 </Config>
</Printers>
The above output channel configuration named “AFP ICCP” will generate documents in AFP output format and convert all color images to AFP IOCA FS45 CMYTK format using the ICC Profile CoatedFOGRA39.icm when doing the RGB to CMYK conversion. The CoatedFOGRA39.icm resides in a sub directory called “ICC Profiles” (in relation to the PrtConfig.xml file).
Input ICC is uded when the image is missng ICC profile. (See chapter 24.1)
PDF Simplex
<?xml version="1.0" encoding="windows-1252"?>
<Printers>
 <Config Name="Simplex PDF" Simplex="1" OutType="PDF" ImageColor="RGB" OperandColor="RGB"
Desc="Presented in GUI">
 <ImageConversion ResizeMethod="" DitheringMethod="" XResolution="300" YResolution="300"/>
 </Config>
</Printers>
The above output channel configuration named “Simplex PDF” will generate documents in PDF output format and force all pages to be simplex.
PDF Preview
<?xml version="1.0" encoding="windows-1252"?>
<Printers>
 <Config Name="Preview PDF" Simplex="" OutType="PDF" ImageColor="RGB" OperandColor="RGB" Desc="Presented
in GUI">
 <ImageConversion ResizeMethod="" DitheringMethod="" XResolution="96" YResolution="96"/>
 <Watermark ImageSource="Draft.png" X="65" Y="130"/>
 </Config>
</Printers>
The above output channel configuration named “Preview PDF” will generate documents in PDF output format and print a watermark image called “Draft.png” on every page.
PDF with fields
<?xml version="1.0" encoding="windows-1252"?>
<Printers>
<Config Name="PDF with fields" OutType="PDF" MIME="application/pdf" ImageColor="RGB" OperandColor="RGB"
Desc="Presented in GUI">
<ImageConversion ResizeMethod="" DitheringMethod="" XResolution="300" YResolution="300"/>
<SpecialSettings IncludeFields="1" />
</Config>
</Printers>
The above output channel configuration named “PDF with fields” will generate documents in PDF output format with input fields (if present). This functionality is protected under licens.
PostScript
<?xml version="1.0" encoding="windows-1252"?>
<Printers>
<Config Name="Postscript Printer" Simplex="" OutType="PS" ImageColor="RGB" OperandColor="RGB"
Desc="Presented in GUI">
<ImageConversion ResizeMethod="" DitheringMethod="" XResolution="300" YResolution="300"/>
<Inputbins>
<Bin Name="0" OutName=""/>
<Bin Name="1" OutName="<</MediaPosition 1>> setpagedevice"/>
<Bin Name="2" OutName="<</MediaPosition 2>> setpagedevice"/>
<Bin Name="3" OutName="<</MediaPosition 3>> setpagedevice"/>
<Bin Name="4" OutName="<</MediaPosition 4>> setpagedevice"/>
<Bin Name="5" OutName="<</MediaPosition 5>> setpagedevice"/>
<Bin Name="6" OutName="<</MediaPosition 6>> setpagedevice"/>
<Bin Name="7" OutName="<</MediaPosition 7>> setpagedevice"/>
<Bin Name="8" OutName="<</MediaPosition 8>> setpagedevice"/>
</Inputbins>
<Outputbins>
<Bin Name="0" OutName=""/>
<Bin Name="1" OutName="<</OutputType (MailBin8)>>setpagedevice"/>
<Bin Name="2" OutName=""/>
<Bin Name="3" OutName=""/>
</Outputbins>
</Config>
</Printers>The above output channel configuration named “Postscript Printer” will generate documents in PostScript output format and set different PostScript commands when calling different input and output bins.
PostScript include external EPS files
<?xml version="1.0" encoding="windows-1252"?>
<Printers>
 <Config Name="PS Include EPS" OutType="PS" ImageColor="RGB" OperandColor="RGB" Desc="">
 <ImageConversion ResizeMethod="" DitheringMethod="" XResolution="300" YResolution="300"/>
 <SpecialSettings ImgSubst="1" Mime="application/postscript" Ext=".eps"/>
 </Config>
</Printers>
The above output channel configuration named “PS Include EPS” will generate documents in Postscript output format and include external EPS files inline in the output file.
EMF
<?xml version="1.0" encoding="windows-1252"?>
<Printers>
 <Config Name="EMF" OutType="EMF" ImageColor="RGB" OperandColor="RGB" Desc="Presented in GUI">
 <ImageConversion ResizeMethod="" DitheringMethod="STUCKI" XResolution="96" YResolution="96"/>
 <SpecialSettings Dummy=""/>
 </Config>
</Printers>
The above output channel named ”EMF” is used to control how images are displayed in MetaTool’s preview. In this case all images are displayed with resolution 96 DPI in preview.
PS. This configuration file is used by MetaTool and other Metaforce applications. If you do local adjustments you have to make sure that the same adaptations are available on all other computers too. For obvious reasons you should make a security backup of your adjustments. DS.
MFDX PDF
<?xml version="1.0" encoding="windows-1252"?>
<Printers>
<Config Name="MFDX" OutType="MFDX" MIME="application/pdf" ImageColor="RGB" OperandColor="RGB"
Desc="Beskrivning av typen som kan användas i GUI;s!">
<ImageConversion ResizeMethod="" DitheringMethod="" XResolution="300" YResolution="300"/>
<SpecialSettings Dummy=""/>
</Config>
</Printers>
The above output channel named “MFDX” will generate the MFDX-format which is a format that contains self contained documents (in this case normal PDF) together with XML metadata.
MFDX PDF/A
<?xml version="1.0" encoding="windows-1252"?>
<Printers>
<Config Name="MFDXPDFA" OutType="MFDX" MIME="application/pdf" ImageColor="RGB" OperandColor="RGB"
Desc="Beskrivning av typen som kan användas i GUI;s!">
<ImageConversion ResizeMethod="" DitheringMethod="" XResolution="300" YResolution="300"/>
<SpecialSettings InnerType="PDFA" ICCProfile="C:\Windows\System32\spool\drivers\color\sRGB Color
Space Profile.icm"/>
</Config>
</Printers>
The above output channel named “MFDXPDFA” will generate the MFDX-format which is a format that contains self contained documents (in this case PDF/A) together with XML metadata.
Printer configuration
In the page templates of the MetaLogic file among other things the input and output trays are stated. The numbers of input and output trays are limited for practical reasons; there might, however, also be restrictions due to the underlying output formats and the printers. To be able to do local adjustments Metaforce uses this configuration file in XML format, which maps input and output trays and states if color is permitted in AFPDS and if there is to be a tumble when printing duplex in PostScript.
From version 9.0.0, CMYK can be used as a valid value for color code in ImageColor and ImageOperand.
The configuration file is to be found under “MetaDir\Prt\Conf” named “PrtConfig.xml”. In its standard version it looks like the following;
<?xml version='1.0' encoding='iso-8859-1'?>
<!-- DitheringMethod valid values
 "BURKES"
 "CLUSTERED"
 "FLOYDSTEIN"
 "JARVIS"
 "NODITHERING"
 "ORDERED"
 "SIERRA"
 "STEVENSONARCED"
 "STUCKI"
 ""
 ResizeMethod valid values
 "BELL"
 "BICUBIC"
 "BILINEAR"
 "BOXFILTER"
 "BRESENHAM"
 "CATROM"
 "COSINE"
 "CUBIC_B_SPLINE"
 "CUBIC_CONVOLUTION"
 "HERMITE"
 "LANCZOS"
 "MICHELL"
 "NORMAL"
 "QUADRATIC"
 "QUADRATIC_B_SPLINE"
 "RESAMPLE"
 "TRIANGLE"
 ""
 ImageColor valid values
 "BW"
 "CMYK"
 "RGB"
 OperandColor valid values
 "BW"
 "CMYK"
 "RGB"
 Required valid values
 "True"
 "False"
 OutType valid values
 "AFP"
 "PDF"
 "PS"
 "XML"
 "DXML"
 "EMF"
-->
<Printers>
 <Config Name="PBMSBW" OutType="AFP" ImageColor="BW" OperandColor="BW" Desc="Presented in GUI">
 <ImageConversion ResizeMethod="" DitheringMethod="" XResolution="240" YResolution="240"/>
 <SpecialSettings Dummy=""/>
 <Inputbins Comment="Maximum inputbins in AFP (MODCA) are 255. MetaForce has set a limit for AFP
 at 8...">
 <Bin Name="0" OutName="0"/>
 <Bin Name="1" OutName="1"/>
 <Bin Name="2" OutName="2"/>
 <Bin Name="3" OutName="3"/>
 <Bin Name="4" OutName="4"/>
 <Bin Name="5" OutName="5"/>
 <Bin Name="6" OutName="6"/>
 <Bin Name="7" OutName="7"/>
 <Bin Name="8" OutName="8"/>
 </Inputbins>
 <Outputbins Comment="Maximum outputbins in AFP (MODCA) are 65536. Metaforce has set a limit for AFP
 at 3...">
 <Bin Name="0" OutName="0"/>
 <Bin Name="1" OutName="1"/>
 <Bin Name="2" OutName="2"/>
 <Bin Name="3" OutName="3"/>
 </Outputbins>
 </Config>
 <Config Name="AFP" OutType="AFP" MIME="application/x-afp" ImageColor="CMYK" OperandColor="CMYK"
Desc="Beskrivning av typen som kan användas i GUI;s!">
 <ImageConversion ResizeMethod="" DitheringMethod="FLOYDSTEIN" XResolution="600" YResolution="600">
 <ColorConversion InputICC="ICC Profiles\sRGB_v4_ICC_preference.icm" OutputICC="ICC
Profiles\CoatedFOGRA39.icm">
 <NOGamma Plane="C" Value="10"/>
 <NOGamma Plane="M" Value="10"/>
 <NOGamma Plane="Y" Value="10"/>
 <NOGamma Plane="K" Value="10"/>
 </ColorConversion>
 </ImageConversion>
<SpecialSettings Dummy=""/>
 <Inputbins Comment="Maximum inputbins in AFP (MODCA) are 255. MetaForce has set a limit for AFP
 at 8...">
 <Bin Name="0" OutName="0"/>
 <Bin Name="1" OutName="1"/>
 <Bin Name="2" OutName="2"/>
 <Bin Name="3" OutName="3"/>
 <Bin Name="4" OutName="4"/>
 <Bin Name="5" OutName="5"/>
 <Bin Name="6" OutName="6"/>
 <Bin Name="7" OutName="7"/>
 <Bin Name="8" OutName="8"/>
 </Inputbins>
 <Outputbins Comment="Maximum outputbins in AFP (MODCA) are 65536. Metaforce has set a limit for AFP
 at 3...">
 <Bin Name="0" OutName="0"/>
 <Bin Name="1" OutName="1"/>
 <Bin Name="2" OutName="2"/>
 <Bin Name="3" OutName="3"/>
 </Outputbins>
 </Config>
 <Config Name="PDF" OutType="PDF" ImageColor="RGB" OperandColor="RGB" Required="True" Desc="Presented in
GUI">
 <ImageConversion ResizeMethod="" DitheringMethod="" XResolution="300" YResolution="300"/>
 <SpecialSettings Dummy=""/>
 </Config>
 <Config Name="PreviewPDF" OutType="PDF" ImageColor="RGB" OperandColor="RGB" Required="True"
Desc="Presented in GUI">
 <ImageConversion ResizeMethod="" DitheringMethod="" XResolution="96" YResolution="96"/>
 <Watermark ImageSource="Draft.png" X="65" Y="130"/>
 <SpecialSettings Dummy=""/>
 </Config>
 <Config Name="XML" OutType="XML" ImageColor="RGB" OperandColor="RGB" Desc="Presented in GUI">
 <ImageConversion ResizeMethod="" DitheringMethod="" XResolution="300" YResolution="300"/>
 <SpecialSettings Dummy=""/>
 </Config>
 <Config Name="DXML" OutType="DXML" ImageColor="RGB" OperandColor="RGB" Desc="Presented in GUI">
 <ImageConversion ResizeMethod="" DitheringMethod="" XResolution="300" YResolution="300"/>
 <SpecialSettings Dummy=""/>
 </Config>
 <Config Name="PS" OutType="PS" ImageColor="RGB" OperandColor="RGB" Required="True" Desc="Presented in
GUI">
 <ImageConversion ResizeMethod="" DitheringMethod="" XResolution="300" YResolution="300"/>
 <SpecialSettings Dummy=""/>
 </Config>
 <Config Name="EMF" OutType="EMF" ImageColor="RGB" OperandColor="RGB" Desc="Presented in GUI">
 <ImageConversion ResizeMethod="" DitheringMethod="STUCKI" XResolution="96" YResolution="96"/>
 <SpecialSettings Dummy=""/>
 </Config>
</Printers>
Note 1. This configuration file is used by MetaTool and all other Metaforce applications. If you do local adjustments you have to make sure that the same adaptations are available on all other computers too. For obvious reasons you should make a security backup of your adjustments.
Note 2. Before installing a newer version of Metaforce application on a server, make certain that a backup of the current existing PrtConfig.xml file is done to prevent any loss of information.
Note 3. If you will print AFP files and your MetaLogic file contains one or more canvas objects you will have to use SpecialSettings to determine the quality of printed result of the vectors.
SpecialSettings for AFP files, vectors and IMM (Invoke Medium Map).
<SpecialSettings RasterizeCanvas="0" AllowBezier="1" ForceIMM="true"/>
- RasterizeCanvas=1 the canvas will be create as a picture (with correct solution and cmyk code).
- AllowBezier=“1” the canvas will be printed as Bezier curves.
If none of the above settings are set, the canvas will be printed as many lines.
ForceIMM=“true” will force IMM generation on every page.
Default behavior is to optimize the AFP-file to only generate IMM when needed.
SpecialSettings for PDF files.
<SpecialSettings PrintScaling="None" />
PrintScaling is to control the page scaling when the PDF document is printed. Valid values are None and AppDefault.
- PrintScaling=“None” indicates no page scaling when printing the document.
- PrintScaling=“AppDefault” indicates the application should use the current print scaling.
If PrintScaling are not set, the application uses the current print scaling.
Centerpoint audit
Since Interact version 11.4 Metatool and MFSolutions has the ability to generate audit logs whenever these applications log in to the Solutions database.
Metaengine Configuration
Many of the Interact programs needs configuration of some common attributes. These configuration can either be located in the Windows registry or in a configuration file called metaengine.config.xml in the Interact bindirectory.
| Configuration attributes | Description |
|---|---|
| MetaDirPath | The path to Metadir. |
| MetaFontPath | The path to the fonts directory. |
| MetaConfigPath | The path to where the PrtConfig.xml resides. |
| DEBUG | Value could be either ‘false’ or ‘true’. ‘true’ meaning that Metaengine should emit debug logs to the temp-directory of Interact. |
| DEBUGPATH | The path to the directory where debug logs should be written. |
| CenterpointIdentityUrl | The URL to Centerpoint Identity server. |
| CenterpointUrl | The URL to Centerpoint server. |
| AuditEnable | Value could be either ‘false’ or ‘true’. ‘true’ meaning that audits should be emitted to Centerpoint. |
| AuditLogUrl | The URL to the Audit api. |
| WebEditorEnable | Value could be either ‘false’ or ‘true’. ‘true’ meaning that the WebEditor button should be enabled. |
| WebEditorUrl | The URL to the WebEditor api. |
| TemplateManagerEnable | Value could be either ‘true’ or ‘false’. ‘true’ meaning that the upload of enabled Solution projects should be enabled. |
| TemplateManagerUrl | The URL to the Template upload api |
metaengine.config.xml
<?xml version="1.0" encoding="UTF-8"?>
<configuration>
<appSettings>
<add key="MetaDirPath" value="C:\Metahome\MetaDir.11\"/>
<add key="MetaFontPath" value="C:\Metahome\Fonts\"/>
<add key="MetaConfigPath" value="C:\Metahome\MetaDir.11\Prt\Conf\"/>
<!--<add key="DEBUG" value="1"/>-->
<!--<add key="DEBUGPATH" value="Path to Log directory."/>-->
<add key="CenterpointIdentityUrl" value="URL to Identity server"/>
<add key="CenterpointUrl" value="URL to Centerpoint server"/>
<add key="AuditEnable" value="false"/>
<add key="AuditLogUrl" value="URL to Audit api"/>
<add key="WebEditorEnable" value="false"/>
<add key="WebEditorUrl" value="URL to WebEditor api"/>
<add key="TemplateManagerEnable" value="false"/>
<add key="TemplateManagerUrl" value="URL to the Template upload api"/>
</appSettings>
</configuration>
Windows registry